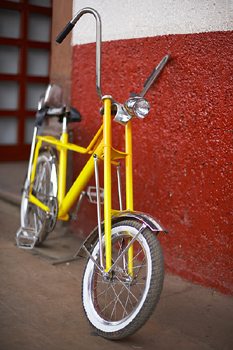
How to Paint a Bike
Fixing up an old bicycle might seem like a daunting task at first. With the right tools and materials, though, you’ll learn how to paint a bike and make your bicycle look brand new.
You can transform the look of your old bicycle by repainting it, using fine paints, quality brushes and careful technique. Learning how to paint a bike by yourself can be more cost-efficient than taking it to the bike shop. Fixing up a bicycle doesn’t have to be a hassle, if you know the right approach.
Bike Painting – Things You’ll Need
Before you begin learning how to paint a bike, make sure you have the following items in your possession.
- Protective gloves
- A face mask or goggles
- Sandpaper (80-grit, 220-grit and 1200 grit for the various steps of the repainting process)
- Bike de-greaser (CleanSafe, Finish Line and Spin Doctor make decent citrus degreasers. If you want to “go green,” try the Simple Green bike cleanser)
- Rust-Proof Primer (Many people use Rustoleum for this initial painting layer)
- Paint (Half a pint to a pint is usually enough to make about 3 or 4 coats on your bicycle depending on personal preference)
- Windex
- Lacquer
- Hanging Rack
Preparing Paint Your Bike
Wear your protective gear, including face mask and gloves, before you begin working on your bicycle. Remember that a lot of the chemicals you’ll be dealing with are toxic and can irritate your skin or eyes with any contact.
Take apart your old bicycle, before you begin any serious painting. Use a car body wipe or degreaser for bicycles, to wipe the excess grease off your bike. If your bike has a bunch of grease on it, the paint won’t stay on properly.
Sanding Your Bike in Preparation
Purchase some medium-grade sand paper or 80-grit rough sponge to sand down any old paint on your bike. This makes your paint job look a lot cleaner and more professional.
Don’t forget to use putty to fill in minor holes or dents in the body of your bicycle. Sand the putty down, if you plan on painting over it.
Tape Your Bike

How to Paint a Bike
Apply painter’s tape to the areas of the bicycle apparatus, if there are parts you don’t want painted. Pay special attention to the forks and the bottom bracket of the bike. Also make sure to tape areas that serve as joints for screws or bolts, so that you don’t have problems rebuilding your bike after the paint procedure.
Finally, hang up your bicycle or bicycle parts by the head tube on a hanging rack, so that the paint drips downward in the same direction and does not clump on the middle of your bicycle frame.
Bicycle Primer
First, apply your rust-proof paint primer all over your bicycle’s frame. This seals your bicycle’s metal and protects it from future rust or weather damage, if applied correctly. Make sure to apply the primer in thin coats around your bicycle, so it dries before you do the actual painting.
Once again, let your bicycle hang to dry thoroughly for 24 hours, after you’ve applied the primer.
Sanding the Bike Again
Sand your bicycle’s frame with 220-grit sandpaper. This eliminates any of the bumpy imperfections that may have resulted from applying the primer to your bicycle. Sanding down your bike prepares it for the main coat of paint, to achieve maximum effectiveness.
Make sure to wipe your bicycle clean and sand dust-free before you begin painting.
Painting a Bicycle Frame
When painting a bicycle frame, first apply your main coat of paint in even layers on your bicycle. Repeat until you have applied 3 to 4 coats. If you are dealing with a patterned design, make sure your base layer is your lighter color, and always apply the darker paint last.
Wait for the paint to completely dry on the bicycle, after you have finished all the coats.
Sanding the Bicycle Once More
Take the 1200-grit sandpaper and sand down your bicycle after it dries, to get rid of the glossiness of the paint. Make sure you “wet-sand” your bike – that is, use Windex to wet the bike and sand it down with the paper, while it’s wet. This prepares your bike for the final step – applying the lacquer.
Spraying on Lacquer
Spray the lacquer onto your bicycle from a close range, to prevent your bike’s surface from acquiring a bumpy texture. Wait at least one week before you assemble your bicycle back together, to make sure the lacquer sets. It takes a long time for the lacquer to set, but it’s well worth the wait.
Putting Your Newly-Painted Bicycle Back Together
Remove the separate parts of your bicycle from their hanging racks and pay close attention to the assemblage. Buy standard grease and apply it to the bearings and other mechanisms of your bicycle to protect your bicycle’s critical functioning gears from general wear. Put your bike back together in a gentle and firm fashion.
By now, your newly painted bicycle should look as good as new. There are a lot of steps in learning how to paint a bike, but none of the steps are hard. Painting a bike takes time, but you’ll be proud of the new paint job, while enjoying the comfort of riding your old bike.
