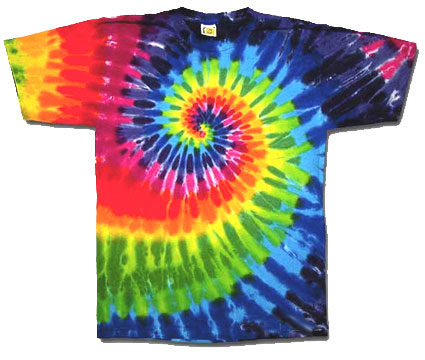
Make Your Own Tye-Dye T-Shirts – For Kids
Create Tie-Dyed Clothing
While people often associate tie-dye styles with the hippie culture of the ‘60s and ‘70s, it’s been around far longer than most would imagine. In Peru, for example, examples of tie-dyed clothing have been traced back to somewhere between 500 and 800 A.D.
The art of tye-dyeing remains popular to this day, and our article is devoted to showing you how to make your own tye-dye t-shirts. Kids love tie-dye designs, and the vibrant colors and patterns allow them to explore their creative side while making something they can wear around the house and during casual activities. Grown-ups may also want to get in on the act, allowing the whole family to look like they’re going to Woodstock.

Tie-Dye Materials
Before you begin the tie-dyeing process, you’ll first need to gather together the necessary materials. I recommend the following:
- Bowl of soapy water (a large bowl works best)
- 100% Cotton T-shirts (one or more, depending on how many tie-dyed shirts you wish to make)
- Rubber bands
- Marbles or coins (tied into the fabric to achieve particular tie-dye designs)
- Latex gloves
- Salt (you’ll need one cup per dye bath)
- Fabric dye (multiple colors work best)
- Buckets (at least 2)
- Paper towels
- Plastic bags (sealable)
- Plastic bottles (spray and squeeze)
- Duct tape
- Garbage bags
- Tye-Dye Shirts for Kids (and Adults)
Now that you’ve assembled all your materials, it’s time to jump right in and start experimenting with the groovy world of tie-dye.
- Step #1 – First we’ll need to set up the dyeing area. This works best outside, especially since the dye you’ll be using is permanent. Find an old table or other outside workspace and cover it with a few garbage bags. Use the duct tape to secure the bags to the workspace. Keep the paper towels and a trash can nearby, as well as soapy water for washing your hands (or you can use latex gloves).
- Step #2 – Before your 100% cotton t-shirts can be tye-dyed, they’ll need to be prepared. This is accomplished by soaking them in water for a few minutes. Some dyes may also require the shirts to be soaked in soda ash beforehand (which results in more vibrant colors). If so, add the soda ash mixture–which should be included with the dye–into the water while soaking for 20 minutes. If the soda ash wasn’t included, you can always buy some at your local crafts store.
- Step #3 – Once the t-shirts have been soaked, use the rubber bands to tie off sections of the shirt. This will allow the dye to color certain sections while leaving others less affected. For the best results, use a combination of tying and multiple dyes to create a multi-colored piece of apparel. The following are the most commonly created patterns when learning how to make your own tye-dye t-shirts: circles (large or small), single stripe, multiple stripes, and a spiral design. Experiment to find the pattern you like best.
- Step #4 – Now you’ll need to prepare the dye bath. This can be accomplished by following the directions on the package of dye you’ve purchased. It’s also a good idea to dissolve one cup of salt into warm water and then add it to the dye bath. This will allow for more vivid colors, as well as helping the dye to set.
- Step #5 – Now that the dye bath is ready and the shirts have been tied, place them into the dye mixture. Allow them to soak for several minutes (I suggest at least 10), then wring them out and place them inside a plastic bag (making sure to seal it up).
- Step #6 – The tye-dyed shirts should be allowed to sit in their individual bags overnight.
- Step #7 – The following day, put on your latex gloves, remove the shirt from the bag, and take off the rubber bands. You’ll want to rinse the shirt to remove any excess dye, and you should always begin with warm water and then change to cool. When the water becomes clear, you’ll know that the rinsing process is complete. Be careful not to get any dye on your clothes, or it will stain the fabric permanently.
- Step #8 – Put the shirt in the washing machine and wash it with cold water (no detergent). Once the cycle is through, it’s smart to remove the shirt and run another cycle with detergent and warm water to remove any additional dye which may have come off in the machine (otherwise, your next load of clothing could be dyed).
- Step #9 – To dry your tie-dyed shirt, you can either hang it up or put it in the dryer on the coolest setting. When in doubt, hang it up to dry.
- Step #10 – Once the shirt has been worn for the first time, it’s recommended that you once again wash it separately just in case any dye remains. From that point forward, the shirt should be safe to put in with your normal load of clothes.
Congratulations, you now know how to make your own tye-dye t-shirts for kids (and adults). Once you’re outfitted and in the mood, put on some Hendrix, plug in a lava lamp, and get ready to feel those good vibrations washing over you.
