Cooking Guides
How to Cook Spaghetti Squash
Ways to Cook Spaghetti Squash
Spaghetti squash goes by many different names: winter squash, vegetable spaghetti, noodle squash, and gold string melon. Whatever you call it, this winter squash is low in calories, can be used as a replacement for pasta, and the seeds can be roasted and seasoned and served separately or as an addition to squash recipes. (See also: Butternut Squash Recipes.)
Personally, I like to serve spaghetti squash as plain as possible. When I find really good spaghetti squash at a farmer’s market or directly from a farmer, I trust that the flavor will be good enough pretty much all on its own. An easy way to cook spaghetti squash is sometimes the best way to prepare it.
 How to Choose Spaghetti Squash
Since picking a good spaghetti squash is as important as cooking it well, here’s a quick guide to selecting the best squash you can find.
The best spaghetti squash have shiny and pale skin. As for the color, I try to pick the spaghetti squash that is closest to the color of a ripe lemon. When you find spaghetti squash that is either white or green, don’t buy it. I hate unripe squash more than I hate unripe fruit, and white and green-colored spaghetti squash was simply picked too soon.
The weight of a spaghetti squash is equally important. When I buy spaghetti squash, I always make sure to pick the squash up and “weigh” it in my hand. Good squash feel really heavy, especially when compared to their small size. Dense squash cooks better and tastes better in my experience.
Don’t buy spaghetti squash that are too big, too light, or too miscolored. I tend to buy pieces of spaghetti squash that weigh in between 3.5 and 4.5 pounds. Squash outside this weight range are usually old, chewy, and even bitter or tasteless. I also avoid squash with bumps, black spots, cracks, or “bruises.”
When you get your spaghetti squash home, stick it in the fridge ASAP. Remember, squash is perishable, so don’t keep it around for more than four or five days, and don’t wash or prep the squash until you are ready to cook it.
How to Cook Spaghetti Squash in the Oven
The simplest and tastiest recipe for ripe spaghetti squash is a basic oven roast. You’ll start by cutting the squash in half lengthwise. You need a heavy sharp kitchen knife to do this right, and be careful as the shape of the squash makes it really easy to slip off the cutting board.
The seeds and strings inside the squash should be scooped out like a pumpkin, leaving two round pieces of squash with indentations in the center.
Preheat your oven to 400 degrees. A good hot oven is crucial to roasting any veggies, especially a dense veg like spaghetti squash.
Drip a tiny bit of olive oil into the squash and rub it around the flesh with your fingers. Don’t overdo the oil or it can burn or smoke in the hot oven.
Season your squash to your tastes. Personally, I sprinkle on sea salt and fresh cracked pepper. If I’m feeling adventurous or if the squash isn’t exactly in season, I’ll throw on a little paprika, but SIMPLE is the name of the game for this recipe.
Place the squash (cut side DOWN) in a baking dish. When the oven is heated to 400 degrees, slide the squash in. Roast is for between 35 and 45 minutes or until the flesh is tender and changes color. Serve with butter or a little more olive oil.
Cooking Spaghetti Squash in the Microwave
Cut the spaghetti squash in half lengthwise, and place the cut side down on a microwave safe dish. Cover the whole thing with plastic wrap. I always leave a steam vent–otherwise the wrap will “pop” open in the microwave and could stick to the squash itself.
Cook the squash in the microwave for ten minutes, being sure to turn the squash every two minutes if your microwave doesn’t have a spinning plate.
I don’t use the microwave method if I can help it. Oven-roasting gives the squash a special flavor that you can’t replicate in a microwave. If you’re in a hurry, the microwave saves you about half an hour of cooking time, but doesn’t allow you to bake the seasoning into the flesh.
Making Spaghetti with Spaghetti Squash
Spaghetti squash is so named because the flesh can be prepared in such a way that it looks like spaghetti noodles. For a low carb and gluten free (not to mention delicious) alternative to spaghetti noodles, you can turn your squash into noodle like strings.
Cook spaghetti squash according to either the oven or microwave method above. Flip the squash so that the flesh side is facing up. Be careful, as the squash is usually hot and I always burn my fingers flipping it over.
Grab a dinner fork, the larger the better, and start to scrape the flesh from the rind. Scrape around the rind toward the center, like you’re making a leaf pile in the yard. “Fluff” the strands away from the rind as you scrape by lifting the fork up and towards the center of the pile. You’ll start to notice “strands” like noodles.
This whole process takes less than thirty seconds and yields an interesting looking and healthy low carb pasta substitute that goes well in pasta dishes, salads, or eaten all on its own. To impress dinner guests, I like to “flash fry” these strands in really hot oil for a unique and crispy appetizer.
Spaghetti squash is easy to grow in lots of different climates and is a common item in grocery stores and at farmer’s markets. Most people just don’t know what to do when they get their hands on a beautiful spaghetti squash specimen. Selecting a good squash and storing it properly is 75% of the battle. Cooking the squash itself is simple, though cooking spaghetti squash in the oven usually makes me restless.
Serve spaghetti squash noodles with butter, olive oil, or even your favorite pasta sauce. Spaghetti squash is extremely low-carb and tastes divine. Enjoy!
How to Cook Brown Rice
How to Cook Brown Rice
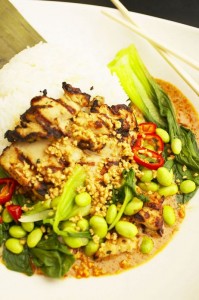
Also called “hulled rice,” brown rice is basically unmilled or only partially milled rice. No different from standard white rice except for the fact that it is virtually unrefined, brown rice is a healthy alternative to good old white rice.
Besides being healthier, brown rice has a more pleasant texture (more al dente) and has a nutty flavor that white rice lacks. To make white rice, the “germ” inside a grain of rice is milled out. In brown rice, that germ is still intact, which gives brown rice the flavor, health benefits, and texture it is famous for. This germ also makes brown rice more susceptible to spoilage than white rice, so buying and storing brown rice properly is important.
 Why Is Brown Rice Healthy?
Brown rice is not the healthiest grain, by a longshot. That honor goes to my personal favorite grain quinoa. But it is healthier than white rice and many people prefer its taste and texture.
Actually, brown rice and white are nutritionally pretty similar. They contain an almost equal amount of calories, carbohydrates, and protein.
The big difference between brown and white rice is in the vitamin and mineral content. Lots of good vitamins and dietary minerals are milled out of brown rice to make white rice. Vitamin B1, vitamin B3, and iron are the biggest losers in the milling process, so sometimes white rice has nutrients like iron added to it, and the white rice is then called “enriched” white rice. All white rice sold in the US is required to be enriched this way, as part of the rice milling restrictions put in place by the FDA.
One mineral that white rice totally lacks that you can find in brown rice is magnesium. One cup of brown rice has 84 milligrams of magnesium compared to trace amounts found in white rice. Magnesium is important for many bodily functions and processes.
Magnesium builds strong muscles and improves nerve function. Magnesium keeps the heart healthy, provides a steady heart rhythm, supports the immune system, and strengthens bones. Magnesium regulates blood sugar levels, so brown rice is a big part of diabetic diets. Magnesium helps normalize blood pressure, and is crucial for protein synthesis. Brown rice in combination with meat produces some of the best protein in the dietary world.
Cooking Brown Rice
Because brown rice isn’t milled or is only partially milled, it takes longer to cook. I used to shy away from brown rice just because it takes so darn long to cook, but once you learn the proper way to prepare brown rice, you’ll never worry about a slightly longer cooking time again.
I find brown rice more “moody” than white rice. If you don’t do everything exactly right, you’re going to get undercooked and hard rice or mushy soggy rice, both of which are pretty much inedible.
I’ve found the best way to cook brown rice is on the old stovetop. Proper preparation of brown rice takes 35 minutes from when you start to when you’re ready to eat it. Some people have been told that brown rice takes an hour to cook, but using my method, you’ll shave almost a half hour off that time. My brown rice method works for short grain and long grain brown rice, though most recipes call for (and most people prefer) the long grain version.
Start by putting your brown rice and water in the pot, making sure to leave the pot uncovered, but keep a lid andy. My special brown rice prep method requires a ratio of 1 cup rice to 1.5 cups of water. I get my brown rice ready early in the wook, cooking 6 cups of rice with 9 cups of water. That way I can use it throughout the week.
Put the burner on max heat and bring your mixture to a boil. After it boils, put your lid on your pot and drop the heat down to low or even “simmer.” Your rice needs to simmer for 20 minutes exactly–I’ve tried 25 and I’ve tried 15, but 20 minutes is the ideal simmer time with this ratio of water to rice.
When 20 minutes is up, let the rice sit covered in your pot for another 10 minutes. If you’re like me, you like slightly chewy brown rice, so I usually take the lid off the pot at precisely 10 minutes. Make perfect slightly more tender than al dente brown rice.
Adding Brown Rice to Food
The simplest brown rice preparation is usually my favorite. Growing up in the south, I loved a snack of white rice and butter, but here’s a healthier (and yummier) version of that snack with brown rice.
Scoop some cooked rice into a bowl, add soy sauce and a handful or two of sesame seeds. You don’t need to go any farther if you don’t want to–the sesame and soy adds a ton of flavor to the rice–but you can add steamed veggies (like broccoli or even tomato) and fried or baked tofu or tempeh.
Cooked brown rice keeps for up to a week if properly stored in the fridge.
Leftover Brown Rice Recipe
I almost always have extra rice left over from my batch, so I like to make this quick meal when I’m in a hurry to get out the door.
In a small pot, heat a tablespoon of oil for a minute on medium. If you want to stick with the Asian theme, use a dark sesame oil. Otherwise, a healthy oil like canola works well and stands up to the heat.
Throw in chopped veggies and saute them for four or five minutes. My “go to” veggies for brown rice are onions, bell peppers, jalapeno, and green onion. You can use whatever veg you have in the fridge.
Scoop in your leftover brown rice after the veggies are done. I use a 2:1 ratio of brown rice to veggies, but this isn’t a hard and fast rule. Mix the rice and veggies quickly so they stick to each other rather than making a messy “stew.”
Cook this mixture on medium or even low heat for another five minutes, letting the rice get hot and the oil and seasonings to coat the rice. Pour in soy sauce or your favorite hot sauce and “sear” the flavor in by turning the heat back up for another minute.
Brown rice is adaptable and delicious as well as healthy.
How to Cook Tofu
How to Cook Tofu
Tofu gets a bad wrap in the West. Often described as a flavorless meat substitute with an awful texture, tofu is the easiest food to make fun of, a common “yuck” ingredient for kids and adults.
I love tofu when it is prepared properly. If you’re looking to eat less meat for health reasons, to lose weight, or to be environmentally conscious, tofu is a great way to get protein. However, tofu is not a “meat substitute” by any means, and requires a completely different storage and preparation method from anything we commonly eat in the western hemisphere.
 What Is Tofu?
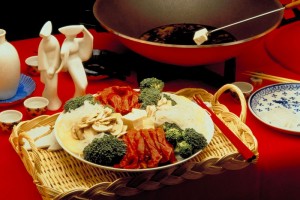
Alright, don’t get grossed out when I tell you this, but tofu is basically mashed soybean curd. Sounds delightful, right? It is meant to have very little flavor or odor, allowing cooks to impart whatever flavor, texture, and odor they want. It originally comes from China and is still a big part of the Chinese, Japanese, and pan-Asian diet. Tofu is catching on in America thanks to an interest in all things Eastern, though in this country it is usually deep-fried and served with a peanut sauce or soy sauce. Trust me–there are lots more ways to enjoy tofu.
Tofu Tips
Here are some quick tips for buying, storing, and cooking tofu. I’ve come up with these after years of getting tofu wrong. Learn from my mistakes and avoid these typical tofu pitfalls.
Fresh Is Best–In Japan and China, where tofu is a staple, it is most often eaten fresh. The Japanese put a huge premium on tofu made and cooked the same day–a near impossibility outside of Asia. If you can’t get fresh tofu, buy organic tofu from a health food store or specialty store. Look for tofu that is as fresh as possible, weeks away from its “sell by” date. Use all tofu that you buy as quickly as you can, and avoid vacuum sealed tofu packages, as the flavor won’t be nearly as intense and nuanced as fresh tofu.
Proper Tofu Storage–This is vitally important. The biggest mistake I was making with my tofu was not storing it properly. I usually buy tofu in pretty big quantities, since I use it as a protein substitute three or four times a week. I was buying vacuum sealed tofu and leaving it in the vacuum sealed package to dry out and lose flavor. If, like me, you are using a little bit of tofu at a time and buying in large doses, you should drain, rinse, and store your tofu in water in a sealed container. Store tofu this way for two or three days, but no more. A nice little trick I’ve found is to add two or three ice cubes to the storage liquid to cool down the tofu before storage. It seems to last longer and make the tofu more flavorful over time. Adding a couple of ice cubes to the storage container chills the tofu faster and extends storage time. If you must store tofu for more than two or three days, take it out of the container, change the water, and clean the container. Ideally, you should never store any tofu at all, but my shopping budget doesn’t always allow for that.
Eat Small Quantities–Remember that tofu is essentially concentrated protein. Don’t try to eat a block of tofu at a time. I mix my tofu up with grains, vegetables, and even other proteins from time to time. Unlike meat, a serving of tofu is just four tablespoons. Tofu is not really a “substitute” for meat, in that you cut a piece of tofu the size of a steak and serve it for lunch. Tofu is a different food item altogether from meat, and you should treat it that way.
Before you serve tofu at your next dinner party or bring a tofu dish to a potluck, check and see if there are any people with soy allergies. Soy is one of the more common food allergies, so even when you cook it for your family and friends, try a tiny portion and work your way up to four tablespoons.
Cooking Tofu
You can ruin any food by cooking it the wrong way. If you’re a steak-lover, I’m sure you’ve had poorly-prepared steaks before. Just because some people don’t know how to cook tofu doesn’t mean tofu isn’t a delicious food.
For almost every cooking application, you want to use “firm” or “extra firm” tofu. When you buy your tofu, check the label. If it says “silky” or “silken,” let it alone for now. For some people, even “extra firm” tofu is too soft. In this case, wrap your block of tofu in a dishtowel, and lay a brick or a heavy pan of water on top to squeeze out extra moisture. I place a heavy brick on top of all my tofu for ten minutes before trying to cook it. I like it super-firm.
Raw tofu may contain bacteria, like any food, so even if you plan on serving it raw, steam it for five minutes to make sure it is clean. Raw tofu is perfect for toddlers–it is flavorless and odorless and full of protein. My two year old daughter loves the stuff. Just be sure to steam it before you serve it. Raw tofu is also known to create gas, and a little steaming will clear that right up.
Fried tofu is easy–slice your tofu into inch-square pieces, marinate it (I use soy sauce and a little ginger) for five minutes or so, then fry on both sides in light oil until it is crispy. These fried tofu pieces can be added to any recipe. My favorite is pasta with a light tomato sauce and fried tofu. It’s a delicious meatball replacement.
If you want to flavor up your tofu even more, spices like cumin, garam masala, curry, and hot peppers are perfect additions. Anything with a strong flavor, like garlic and ginger, works well. My family likes a tofu stir fry with mixed veggies. Add the mix to rice or rice noodles for an authentic and delicious light Asian meal.
How to Cook Quinoa
How to Cook Quinoa
When I cook quinoa, I find there’s really only two ways it can come out: fluffy and mushy. Mushy quinoa is about as delicious as mushy anything, but perfectly-cooked fluffy quinoa is a real treat. Healthier than rice, with a more distinct flavor and nuttiness, quinoa is the best way to eat grains.
If you were to look up “how to cook quinoa” online, you’d probably be advised to cook it in a 1:2 ratio of quinoa to liquid at high heat. I’ve been cooking quinoa for two years now as a rice alternative, and through trial and error I’ve found a better way to prepare it. Basically, when I use a lower quinoa to liquid ratio at low heat over a long period of time, the grain comes 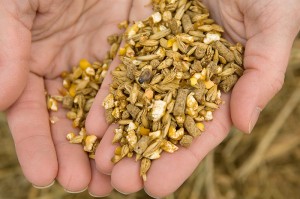 out perfectly fluffy and ready to add to any recipe. Quinoa is not a food item you cook when you only have a half hour to get dinner ready, but if you cook a large batch ahead of time, you can add a little healthy grain to any meal item.
What Is Quinoa?
Pronounced “KEEN-wa,” this relative of leafy green vegetables cooks and eats like a grain with much fewer carbs and much more energy. The flavor is somewhere between brown rice and oatmeal, and when prepared correctly, it has a much more pleasant texture and flavor than rice or other grains.
A cup of quinoa yields just 127 calories, 2 grams of fat, 23 grams of carbohydrates, grams of fiber, and 4.5 grams of protein. That’s more protein than brown rice, fewer carbs, and a much more pleasant taste.
Cooking Quinoa
The first step in cooking quinoa is preparing it to be cooked. There are basically two kinds of quinoa you’ll find in the stores: rinsed and unrinsed. I’ve never had much luck with the rinsed form of quinoa–it always requires extra rinsing anyway. You may as well save a little cash and buy the raw unrinsed version.
I like to soak my quinoa for an hour, but if you’re in a rush you can get away with a 15 minute soak. The soaking actually impacts the nutrition as well as the texture–you get more fiber and protein with soaked quinoa.
After soaking, rinse the grains for a couple of minutes in a fine metal strainer. Don’t have a fine metal strainer? Use a regular colander lined with cheesecloth. Quinoa is so small that a standard colander won’t hold the grains in.
Here’s where my recipe differs from the standard quinoa prep: I add one part quinoa to one and one-fourth parts cooking liquid. You can start to get creative with your quinoa at this step, by choosing a cooking liquid that goes with the dish you’ll be putting the quinoa in. For example, if you’re adding quinoa to a standard soup, you should cook in a mixture of chicken stock and water, or beef stock and water, etc. I personally like the flavor added to quinoa by cooking in fish stock, but some people may find it too exotic.
Bring your quinoa and liquid to a solid simmer, then reduce the heat to low. It’s vital to cover the pot before you cook the mixture for 35 minutes. Not 30 minutes, not 40 minutes–35 minutes is by far the best cooking time. Trust me; I’ve made gallons and gallons of quinoa.
After 35 minutes, pull the pot off the heat and let it sit with a cover on for 5 more minutes. If you’ve followed directions, you now have a pot of fluffy beautiful quinoa to add to any recipe you want. Before you add the quinoa to a dish, “fluff” it with a fork. This basically means you “break up” the grain before adding it to a dish.
How to Serve Quinoa
I like to use quinoa the way I’d use rice, especially brown rice. Quinoa takes less time to cook than brown rice and is far more nutritious and tastier. I add quinoa to stir fry recipes, black beans, soups and stews, and even sometimes eat it all on its own with a pat of butter and a little sugar. Really, recipes that are good with quinoa are limited by your imagination alone.
My Favorite Quinoa Dish
I’m a carnivore at heart, even though I try to eat healthy and have as many meatless meals as possible. When I found myself with a nice pork tenderloin and no idea what to do with it, I immediately though of quinoa. Pretty much all the quinoa in the world comes from Bolivia and Peru. This “South American superfood” is still grown in its native farmland, a place where they coincidentally really love their pork products.
Here’s my standard quinoa recipe. I use it to introduce quinoa doubters to this awesome grain.
Quinoa-stuffed Pork Tenderloin
If you try to eat a gluten-free diet or want to avoid a bread stuffing because of carbs, this quinoa stuffing is perfect. You don’t have to add it to pork tenderloin, as I’ve used it with equal success in turkey and chicken as well as beef, but this is a fairly traditional South American pork dish.
1. Cook quinoa using the above directions.
2. Heat olive oil in a skillet and cook a little onion, garlic, apples, raisins, pine nuts, and mushrooms until the onion has softened. Stir in white wine, and cook a full minute until the liquid starts to evaporate. Mix in the quinoa stuffing until it is even.
3. Preheat your oven to 425 degrees. Cut a pork tenderloin from one side through the middle. Open the two sides and spread them open. Pound the tenderloin with a meat mallet to a thickness of a half inch.
4. Season the tenderloin–I use cinnamon, salt, and black pepper. Spoon the quinoa stuffing onto the tenderloin, then roll it up and tie with twin.
5. Roast in your preheated oven until the pork is no longer pink in the center, about 35 minutes. Cover the roast with aluminum foil, and let the pork rest for an additional 10 minutes.
Quinoa is a delicious, healthy, and adaptable grain from South America. Gluten-free and full of protein and fiber, it can be added to pretty much any dish in place of other grains.
The Ten Healthiest Vegetables to Grow and Eat
Your grandparents or great grandparents most likely had a Victory Garden in their backyard. During the times of food rationing in World War I and II, people were encouraged to grow food in their back yards to ease the food shortage, and as a sign of patriotism and defiance. The garden itself was a sign of victory. It gave ordinary people a chance to feel like they were contributing to the war effort.
Today, the Victory Garden is back in style. But instead of victory over a foreign enemy, we celebrate victory over a sluggish economy, poor health, contaminated and overly processed foods. 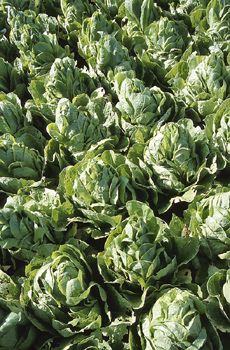 When you grow your own fruits and vegetables, you’re taking responsibility for your health into your own capable hands. Most of us weren’t raised on a farm, and gardening may not come naturally. But if you take your time, and allow yourself a few failures along the way, you’ll soon be an expert gardener and eating fresher, more nutritious foods than ever before.
How to know what to grow
You’ll need to consider your space first. Some vegetables need a plot of land with room to spread out. But many can be grown in a coffee can or even an old boot! Container gardening is part agriculture, part eclectic art. You’ll also need to consider things like growing season, light and water availability, and what you plan to do with a bumper crop. Will you eat everything fresh? Or will you want to preserve, pickle or freeze some of the crop? Make sure you have the space and materials for your storage. If your freezer is full of zucchini, there’s not much room for ice cream.
Most importantly, though, what do you like to eat? And what is most nutritious? Staples like corn and potatoes are plentiful and cheap, so it’s best to put your efforts toward more nutrient dense crops. Here’s a list of the top 10 most nutritious garden veggies. Remember, a garden is a thing of pleasure. Don’t plant a veggie you hate just because it’s on the list. Substitute you favorites in.
Leafy greens
These babies are some of the easiest veggies to grow and come in lots of varieties–spinach, kale and collards are some of the most nutritious greens. “You’ll get more calcium in a bowl of fresh greens than in any dairy product,” says Dr. Brahm, a dentist in Glastonbury, CT. They’re also high in iron, potassium, and Vitamins A, B6, and C.
Broccoli
If you love broccoli, grow lots of it! Broccoli gives you plenty of calcium, iron, and magnesium, as well as Vitamin A, B6, and C. Just one cup of raw broccoli is 130% of your daily recommendation for Vitamin C.
Tomatoes
Tomatoes are some of the most popular garden residents. They contain lots of fiber, iron, magnesium, niacin, potassium, and Vitamin A, B6, and C. They’re also a great source of the antioxidant lycopene. And, well, they’re just so darn tasty!
Bell Peppers
Red bell peppers are high in potassium, riboflavin, and Vitamins A, B6, and C – in fact, one cup of red bell pepper packs an amazing 317% of the recommended daily allowance of Vitamin C and 93% of the recommended Vitamin A.
Garlic & Onions
Onions, leeks and garlic, besides being tasty, contain high levels of antioxidants and phytonutrients. Allicin (the key ingredient) is a known anti-viral, anti-bacterial and anti-fungal agent. You also get lots of vitamin C, B6 and manganese.
Carrots
Carrots are best grown in loose soil without a lot of rocks, which make them hard to grow in some areas. If you have the right conditions, they’re a great choice–very high in fiber, manganese, niacin, potassium, and Vitamins A, B6, and C.
Peas
The only downside to these common garden veggies is it’s hard to get them back to the house without eating them all. Peas are high in fiber, iron, magnesium, potassium, and Vitamin A, B6, and C. They also store well frozen, canned or dehydrated.
Beans
We’re not talking about green beans here, but the kind you can dry and store indefinitely like kidney beans and black beans. Dry beans, in general, are high in iron, fiber, manganese, and phosphorous. They are also a staple protein for vegetarians.
Sweet Potatoes
Sweet potatoes are a great source of nutrition, as long as you stay away from the brown sugar and marshmallows. You’ll get lots of fiber, potassium, manganese and vitamins A, C and B6.
Brussels Sprouts
These baby cabbages get a bad rep from kids, but these fiber-rich veggies pack some serious nutrition. They are a great source of thiamin, riboflavin, iron, magnesium, phosphorus, folate, potassium, manganese and copper, Vitamins A, C, K and B6. Vitamin C, Vitamin K, Vitamin B6,
Whether you’re trading your lawn for a garden plot or just planting a few container veggies, you can’t beat the health benefits of fresh air and fresh food.
How to Make Rock Candy
Learning how to make rock candy is a cinch. Rock candy equates to flavored sugar crystals that can be put on a stick or a string, so making rock candy takes a few simple steps. You and your children can make a batch together as a fun way to introduce kids to cooking in the kitchen.
Making Rock Candy at Home
Making rock candy at home can be a fun process. We’ve put together this guide in order to help simplify the process.
Rock Candy Ingredients
- 2 Cups of Sugar
- 1 Cup of Water
- Food Coloring
- 1 Bowling Pan
- 1 Quart Container (Glass or Jar)
- Cotton Strings (optional)
- Ice Cream Sticks (optional)
- Paper Clip
- Short Piece of String
Tie a String to a Stick
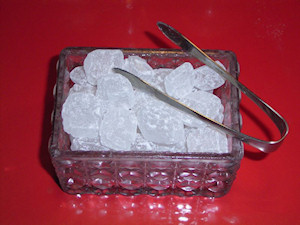
How to Make Rock Candy
Tie your string to a popsicle stick, ice cream stick or pencil. Attack a paperclip to the end of the string, to weigh down the string.
Roll String in Sugar
Moisten the string, but not too much. Roll the string in sugar, which should begin to accumulate sugar crystals. Dangle the string with the sugar and paper clip inside the jar, with your stick spread across the face of the jar, keeping everything from falling completely inside.
Boil 1 Cup of Water – Dissolve Sugar in Water
Boil one cup of water. The water is boiling when it starts to bubble. Then add your two cups of sugar into the water, which creates a sugar solution. Add your favorite color food coloring into the sugar syrup solution.
Once the coloring mixes fully into the sugar water, take the mixture off the boiler.
Pour Syrup into the Jar
Finally, pour the sugar syrup into the jar with the string of sugar. The sugar already on the string should begin to attract sugar crystals from the sugar mixture. Let the jar sit (covered by Saran wrap or plastic wrap) for 2-3 days.
Keep the jar covered for this length of time, though you should check to see if crystals are forming on the string in the meantime. It’s best to use a transparent jar, so you don’t have to remove the covering. Once the crystals have formed to your satisfaction, the process is complete and you can eat your rock candy.
Making Rock Candy
Like I said before, learning how to make rock candy is so easy, even your small kids can help (besides the boiling water part). Making rock candy is a fun family project you can start on Friday afternoon when school lets out, and hopefully be able to enjoy by Sunday afternoon. Each sibling can design rock candy in their favorite color.
How to Make Wine
Making wine is a great project for wine enthusiasts and people who like to “DIY”. Wine has been made in people’s homes for thousands of years — why not give it a try yourself and learn how to make wine?
Most of us get our wine from the liquor store or the supermarket, but wine is easy and inexpensive to make at home. Using the right materials, making wine is pretty much fool proof.
Another benefit of making wine is that you can decide what fruit goes into the wine, how sweet or dry the wine is, and how long you want to age it.
Before you get started making wine, understand the laws behind home brewing. You are allowed to brew up to 200 gallons of wine depending on the number of people in your home. You must be 21 or older to make wine, and you are not allowed to sell your product. You can not distill it into liquor. Check your area regulations to make sure there are no other laws about making wine at home.
Home Wine Making Instructions
Here are home wine making instructions. To get started you’ll need the following materials.
- fruit juice of your choosing
- pounds and pounds of sugar
- Plastic water bottle or glass jug (this is the container for your wine)
- #8-#9 rubber stopper
- yeast
- commercial airlock (find at a brewer’s supply store or specialty food store)
- dowel rod and disposable spoon (for stirring)
- funnel
- turkey baster
- 2 liter bottles
- auto siphon (find at a specialty store)
- sanitizer, lots of sanitizer

How to Make Wine
Gather your fruit juice — use as much juice as the amount of wine you’ll want to make. 5 gallons of juice = 5 gallons of wine. You don’t have to use grapes — you can make cherry wine, apple wine, or whatever you want.
Removing the Stems
Remove the stems & seeds from the fruit. If this is not possible, mash up the fruit without damaging the seeds. The seeds contain nasty things that make the wine taste bad.
Dump this crud, called “must”, into the container.
The tough part — simmer 6 pounds of sugar in water until it becomes a clear syrup, and stir this into the must. Add enough water to almost fill the bucket and mix. You want to leave 4-6 inches of space for the foam and “cap” to rise in the container, or you’ll spill all over the floor.
Pour the Wine Yeast
Pour an envelope of wine yeast and stir up the “wine”. Once a day, for a week or so, stir up the must with your dowel and disposable spoon to break up the “cap”.
Let the mix sit undisturbed for a month. The best spot for your homemade wine is any dark and warm place that doesn’t get too much action. When you’re ready, siphon off the contents (leaving the sediment on the bottom), and drink or bottle it.
If you’re in no rush for your wine, siphon the stuff into another even larger container (this is called “racking”) and let it sit for as long as you can stand. Your wine will get better and more potent with age.
How to Bake a Turkey
Turkey is generally considered one of the hardest meats to cook and although we all indulge in the typical Christmas bird, it can tend to be served dry or under-cooked. Here’s a guide for how to bake a turkey in six simple steps:
Baking a Turkey
The following instructions for baking a turkey are meant to ensure your turkey comes out moist and delicious.
Buy a Fresh Turkey
By starting with a fresh organic free range turkey you are already giving yourself a head start. Using fresh, rather than frozen, enables you to cook a moist and tender turkey with far less effort and you will not need a huge helping of gravy to enjoy it.
Pre-Heat the Oven
Before you have even started preparing your turkey you need to guarantee that you will have a nice hot oven the moment you pop it in. Set you oven at 175 degrees Celsius (350 degrees Fahrenheit).
Prepare the Turkey
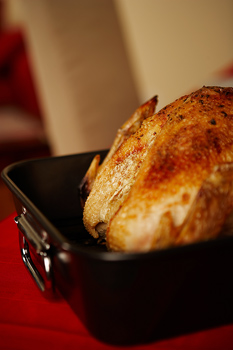
How to Bake a Turkey
Remove all packaging from the turkey and take out all the giblets from within the cavity. Rinse the entire bird to clean off any chemicals etc, and make sure you dry it thoroughly. This will enable to skin to crisp and the wet meat will simply give off steam whilst it is cooking. Once this is complete, run your hand underneath the skin to separate it from the flesh. For extra flavour to both the skin and the meat, place extra ingredients, such as sage leaves, butter and vegetable oil, underneath the skin. Now massage the entire bird with butter and vegetable oil. This will ensure not only a nice crispy skin to serve, but also that it goes a perfect golden brown colour. The final stage of preparation is to liberally season the bird with salt and pepper. Roughly chop onions, celery, apple and lemon, and throw into the cavity of the bird. Also add herbs such as thyme and rosemary. Not only will this add to the taste of the juices that come out of the meat for the gravy, but it will also infuse the smell and flavour of these fresh ingredients into the flesh.
Cooking Your Turkey
Now that your oven is hot and the turkey is ready, it is time to get cooking. Place the turkey in a roasting pan and surround with chopped onions and chicken broth; this will make gorgeous gravy once you are through roasting. Now cover the whole roasting tray with tin foil, preventing the meat from drying out as it is cooking. It is generally better to place it on the bottom shelf of the oven, if possible.
Turkey Cooking Times
Cooking times vary depending upon how heavy your turkey is. The typical rule is that you need to cook it for 20 minutes per pound. With the average turkey this should work out to be approximately 4 hours.
Checking the Turkey
Once you have taken the turkey out the oven it is always a good idea to ensure it is properly cooked all the way through to the middle. This can be done by sliding a thermometer into the deepest part of the meat. Once you have reached 82 degrees Celsius (180 degrees Fahrenheit), it is fully cooked.
How to Boil Asparagus
Knowing how to boil asparagus lets you add one of the most distinct tasting vegetables to your menu with little trouble. Boiled asparagus has a distinct consistency, as well, so while some vegetable haters might complain about taste and texture, those who lost new tastes at dinner time should enjoy mixing in this green veggie.
Asparagus takes just minutes to boil, so it’s also a good vegetable to prepare when you’re in a crunch for time, perhaps while you’re heating up corn or potatoes in the microwave.
Trim the Asparagus
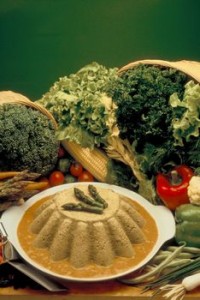
How to Cook Asparagus
Trimming asparagus lets you keep the tasty part, while getting separating the part that’s a little tougher to chew. One way is to trim with an actual knife, simply by cutting where the green part of the asparagus stalk starts to change color. Another method is to break the asparagus stalk with your hand, because the line of the rough part is where the stalks are likely to break off.
This should separate the asparagus into two parts: the stems and the stalks.
Cut into 2-Inch Sections
Next, line up your stems and cut them several at a time every two inches or so. This should make for tasty bites of asparagus.
Putting Asparagus in the Pan
Place the asparagus stalks into the pan, then add cold water until the asparagus is covered by water. Turn the stove top on, to start the boiling process.
Add Spices – Add Stalks
While the water is coming to a boil, add a dash of salt and sugar to the pan. Next, add the cut 2-inch pieces of the asparagus to the water. When the water begins to boil (bubble), take down the heat 1/4th and continuing boiling.
How Long to Cook Asparagus Boil
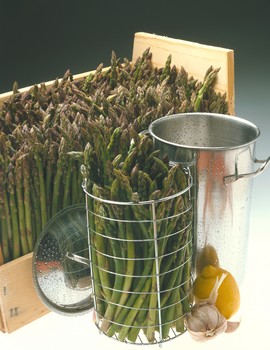
How to Boil Asparagus
How long to cook asparagus boil? Let the asparagus boil from 3 and 1/2 minutes to 5 minutes. Check the asparagus stalks with a fork, before removing. You want the asparagus to be tender.
Once the asparagus is tender, turn off your stove top. Remove the pan and pour the asparagus through a strainer, being careful not to burn yourself on the pan. After doing so, put your asparagus back in the pan.
Add Butter and Salt
Once finished, add butter and salt to the asparagus. Once this part of boiling asparagus is finished, your asparagus is ready to serve.
Asparagus Health Benefits
Asparagus is a source of several vitamins: vitamin A, vitamin C, vitamin E and vitamin K. Asparagus also contains protein, potassium, iron, folic acid, phosphorus, copper, manganese and dietary fiber.
If you notice an odd smell the next time you visit the restroom after eating asparagus, don’t be alarmed. That odor has been noted by scientists and authors alike: everyone from John Arbuthnot to Marcel Proust. The French and Chinese governments have conducted studies, eventually determining that all humans who eat asparagus produce the smell, though only 1/4th of them notice. Go figure.
Boiling Asparagus
Once you know how to boil asparagus, you can start learning new ways to prepare the vegetable. Steamed asparagus is served with roasted pine nuts, which makes for a good contrast in texture. You’ll see asparagus sometimes marinated with mushrooms, while Cantonese restaurants in North America tend to stir-fry asparagus with beef, chicken or shrimp.
Some people cook asparagus into soups and stews, while other grill the vegetable over hardwood. The French are known to boil or steam asparagus with olive oil, melted butter, mayonnaise, parmesan cheese or even hollandaise sauce. So as you see, mastering how to boil asparagus is the doorway into a whole new world of taste.
How to Boil Green Beans
There are so many ways to serve green beans, but learning how to boil green beans is the classic preparation. The debate still rages about whether green beans should be served crisp or tender. While we won’t settle that dispute today, I’ll show you how to boil green beans and let you make that decision yourself.
Prepare the Green Beans
Prepare green beans by washing them thoroughly, the remove their tops and tails. When you get rid of both ends of green beans, you can get rid of the long strings that run the length of the green bean. These can be an annoyance to your guest, if you leave them.
Once you have removed the green bean tops and tails, you can decide whether to leave the green beans whole or cut them into smaller slices. Most people tend to leave them as-is, long and recognizable.
How to Prepare Green Beans
To prepare to boil your green beans, snap the tails and tops off the green beans. These are the pointed parts on either end of the bean. Wash the beans thoroughly, before putting them in the water.
Boiling Green Beans
Fill a saucepan about 25% with water. Add salt and other spices, as desired. Many people add ham or bacon to green beans, to add taste.
Put the green beans into the water and bring the water to a boil, letting the beans simmer. When the water comes to a boil, turn down the heat, so the water doesn’t boil off. If it does, you’ll scorch your beans.
How Long to Boil Green Beens
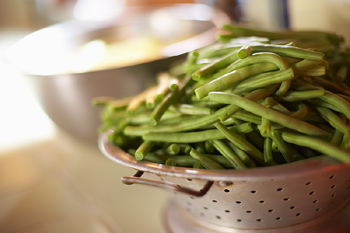
How to Boil Green Beans
How long to boil green beans? Cook for approximately 25 minutes. Check to see if the beans are tender, then spice the beans. Let them simmer another 20 to 30 minutes.
The main decision for when to stop boiling green beans is when you decide they are tender enough for you. Also, some people add potato chunks to green beans halfway through the cooking process.
Blanch the Green Beans
Another option is to blanch green beans quickly. Blanch your green beans by boiling them for 3 or 4 minutes. This removes the skin of your green beans. You want your beans to be somewhat tender, yet have a little bit of crispness to them. Determine the crispness, by how long you boil them.
Boiling Green Beans
As you can see, there are a number of different options when boiling green beans. Different spices and other ingredients are used to add taste, so when you learn how to boil green beans, remember to perfect the green bean preparation that fits your tastes and the taste of your family.
How to Boil Beets
Beets are a healthy and tasty vegetable, so learning how to boil beets lets you add to the variety of good vegetables you should eat. Boiling beets takes a little longer than boiling numerous other foods, but it’s easy to do.
If you’re wondering why beets are good to eat, below are a number of reasons to eat beets – and one particular case where you should choose other veggies to eat. Further down we’ll show you how to boil beets.
Medicinal Uses of Beets
Beets are good for your digestion and blood flow, and some doctors have proposed that betanin in red beets works against oxidative stress. Beets have been used since the time of Ancient Rome as a folk medicine and aphrodisiac, with beet soups being used to cure fevers and constipation. Digestive ailments were treated throughout the Middle Ages with beets.
On the other hand, if you have problems with kidney stones, keep in mind that beets contain oxalic acid, which may help in the formation of kidney stones.
Boiling Beets
Before you start boiling beets, wash them thoroughly and trim their ends off. Those who bought beets at the store should know that a pre-wash has been done already. If that’s the case, you shouldn’t perform a thorough scrub. If you took them out of your garden, though, give beets a thorough washing.
Cut the Beets
Cut the tops of your beets at about 3 inches. Leave enough of the top on to cover the beet while cooking, though, so the taste doesn’t bleed away as quickly.
How Long to Boil Beets
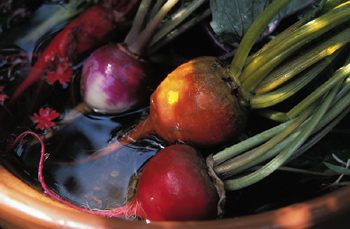
How to Boil Beets
Place the beets in a pan. Cover them with cold water from a faucet. Heat the water up to a boil. You can tell the water is boiling when the water starts to bubble. When the water boils, turn the dial down roughly to 75% of boiling point.
How long to boil beets? Boil the beets until they’re soft. This usually takes between twenty and thirty minutes. Keep checking with a fork, until your know the beets are boiled.
Ending the Boil
When the beets are tender, remove the heat from them, then drain off the water from the pan. Let the beets cool, then carefully peel the beets. Peeling beets is best done when you take the tops off the beat, which should peel off the skin as you remove it.
When peeling beets, remember that you’ll end up with pink hands, from the beet stains. Wearing gloves makes beet peeling messy, as well, at least for the gloves. Wear latex gloves, if you are entertaining and don’t want to entertain with stained hands.
Add Butter Before Serving
Put your boiled beets in a serving bowl.
If the beets cool before it’s time to serve them, re-heat them by putting them in microwave, along with butter, and heat them. If you don’t re-heat the beets, add butter to them anyway. Salt is a good all-purpose seasoning, for just about any cooked food item.
How to Cook Beets Boil
Boiling beets is just one way to serve the vegetable, but it’s the most basic and easiest way. Once you learn how to cook beets boil, consider learning other preparations.
How to Bake a Cake
Baking a cake if often relegated to the cake mix aisle of your local supermarket. While there is an impressive selection of pre-made cake mixes to choose from, the customer has little control over the final outcome of their cake. What’s more, baking a cake from scratch is a simple process that allows the baker to have much greater control over what goes into their cake in terms of quality ingredients. They also have much more control over the appearance and taste of the finished product. While making a cake from scratch can be tricky, the end result will make you never want to try boxed cake again.
If you are making a cake for that special someone for their birthday, instead of getting low grade cocoa powder like that of a boxed cake mix, you can use quality cocoa. Or, instead of being forced into using cheap imitation extracts like those found in boxed mixes, you can take advantage of flavorful, quality extracts. Below is a simple, delectable cake recipe which is sure to be a hit with whoever you bake it for, even if it’s only for yourself.
Homemade Cake Recipes – Chocolate Cake
While there are many homemade cake recipes we feel that this classic chocolate cake recipe will be a good start.
For this recipe you will need:
- 2 1/4 cups all purpose flour
- 1 teaspoon baking powder
- 3/4 teaspoon baking soda
- 1/4 teaspoon salt
- 2/3 cup butter
- 2 eggs
- 3 ounces unsweetened chocolate, melted and cooled
- 1 teaspoon vanilla
Step 1
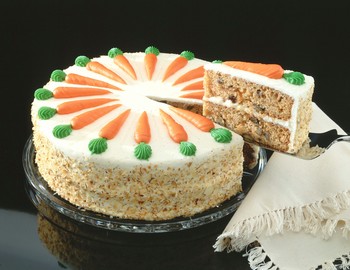
How to Bake a Cake
Grease and flour two 9×1/2 inch cake pans, and set them aside. Combine the flour, baking soda and salt and set them aside as well.
Step 2
Put the butter in a mixing bowl and mix it with an electric mixer (set on medium) for 30 seconds. Add the sugar and continue mixing until it’s well incorporated. Add the eggs one by one and wait until one is blended before adding another. Add the chocolate, vanilla, flour, baking soda and salt while continuing to mix. Add in 1 ¼ cups water and reduce the mixer speed to low. Mix until the batter is just combined. Do not over mix.
Step 3
Pour the batter into the cake pans and bake for 35 minutes at 350 degrees Fahrenheit. The cake is done when you can insert a knife or toothpick into it and it comes out clean. Remove the pans from the oven and let them sit for 10 minutes. Remove the cakes from the pans and let them cool until they can be handled without discomfort.
If you are like most people, you probably prefer your cakes to be frosted. While this is not always the case, it would seem that a majority of people like to eat their cake in this fashion. While you can use pre-made frosting, it seems a little odd to make a cake from scratch and then buy frosting.
Easy Cake Frosting
For this recipe you will need:
- 2 cups sugar
- 1/2 cup cocoa
- 1/2 cup milk
- 1/2 cup butter
- 1/8 cup Karo syrup
- 1 teaspoon vanilla extract
Preparing & Applying Cake Frosting
Mix all ingredients together in a saucepan and raise temperature to a rapid boil. Boil the ingredients for roughly 1 minute and remove from heat to cool. Add one teaspoon of vanilla extract and stir it in thoroughly. Spread generously over the entire surface of the cake making sure not to leave any bare patches. How thickly you spread it is up to you. Also, for those that don’t like frosting but want to jazz up their cake in some other way, a light dusting of powdered sugar makes for an attractive finish. This method will not overpower the flavor of the cake itself like frosting often can.
How to Bake a Ham
Baked ham is one of America’s most beloved dinners. Holidays such as Christmas and Easter typically center around a juicy, delicious, baked ham with an assortment of trimmings. In keeping with its popularity, baked ham is not difficult to make. However, it does take a while to cook and, in some cases, it can take a long time to thaw if the ham you have selected was previously frozen. This delicious comfort food makes for great leftovers as well, assimilating easily into a variety of soups, sandwiches, and stews among other things. Ham bones also make a great flavoring agent for making soup.
When deciding on what type of ham to purchase, there are several things to consider. First, you should decide whether you want to buy a boneless ham, which some people feel is easier to serve because you don’t have to carve around the bone. Also, the weight of the ham is closer to the true weight of edible meat as there is no bone to offset the scale and only water loss during cooking will affect the cooked vs. pre-cooked weight.
Those who prefer the bone in (or “picnic” style ham) tend to feel that the flavor and texture of the meat is superior to the boneless variety. This is in part due to the higher fat content which is a flavor enhancer and also helps to keep the meat moist. After deciding whether to get a bone in or bone out ham, you need to choose between smoked, honey glazed or plain ham. Take into consideration the other components of the meal before making this decision. Would your side dishes be complimented by a smoky meat or a mildly sweet tasting meat? Some hams come spiral cut and some do not.
After making your ham selection, it is important to observe a few simple rules to avoid bacterial contamination in the form of food poisoning. Ham should always be refrigerated at a temperature of 40 degrees or less. Ham should also be used within a day or two of the sell by date found on the packaging it came in. If you cannot prepare it in this time frame, either discard it or freeze it. Ham should always be cooked to an internal temperature of 160 degrees Fahrenheit to make sure any harmful bacteria have been neutralized.
Baked Ham Recipe
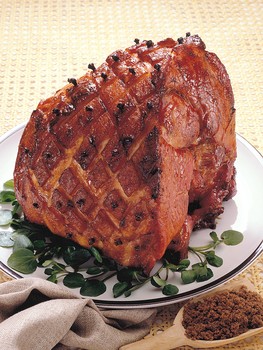
How to Bake a Ham
- 1 frozen ham, uncooked
- Equal parts powdered mustard and brown sugar (optional)
Step 1
Remove the ham from the freezer and thaw it by immersing it in cold water for roughly 20 minutes per pound of ham. Make sure that the ham is sealed in a watertight wrapping to prevent it from coming into contact with the water. Furthermore, make sure you change the water every 30 minutes to guard against bacterial growth. Make sure that the ham is fully covered by the water.
Step 2
Pre-heat the oven to 325 degrees Fahrenheit and place the thawed ham in an aluminum foil lined roasting pan with the fatty side up. The fat will run down the ham as it melts. This will keep the meat moist and negate the need for basting. Leave the ham uncovered and do not add water to the basting pan as this is unnecessary.
Step 3
Allow 20-30 minutes per pound of uncooked ham. Once again, a meat thermometer is the best way to test if the ham is fully cooked. Halfway through baking the ham, flip it over so that the juices are distributed evenly. Try not to poke holes in the ham while it bakes because the juices will run out and dry out the ham. If you would like to add a spicy crust to your ham, mix equal parts of the dry mustard and brown sugar. Evenly and thoroughly cover the surface of the ham 30 minutes prior to taking it out of the oven.
Step 4
Once the ham is done baking and has reached an internal temperature of 160 degrees, remove it from the oven and let it stand for 10-15 minutes before carving. This completes the roasting process as the internal temperature of the meat is still cooking it even though it’s out of the oven.
The above-mentioned procedure was designed for uncooked ham. Using a pre-cooked ham will change the cooking procedure. Consult the packaging instructions for how to prepare a pre-cooked ham. However, while the ham might say pre-cooked, it is still prudent to make sure that the internal temperature of the meat reaches 160 degrees Fahrenheit just to play it safe. However, make sure to not overcook your ham. This can cause it to become rubbery and hard to chew.
How to Bake a Potato
Baked potatoes are a very popular side to any dinner and learning how to bake a potato is quite simple. Baked potatoes have been made for centuries and have been popular all over the world. So popular, in fact, that there are many different regional styles of baked potato. In the U.S., baked potatoes are usually served with sides such as butter, sour cream and chives and they can be eaten as a meal unto themselves. In the U.K., baked potatoes are usually eaten as a snack or a side dish and they are often sold on the streets by vendors. In Russia, the baked potato is not a traditional dish but, surprisingly, it has gained substantial popularity as a fast food item. Baked potatoes go best with steaks, roasts or any other type of red meat dish.
The first step in preparing baked potatoes is finding the right type of potato. There are different types of potatoes available and some are better for baking than others. The best types of potatoes for baking are Russet potatoes and King Edward Potatoes. Russet potatoes are your basic brown skinned potato and they tend to be long and oval shaped. The King Edward potato tends to be more spherical and has white/yellow skin. Both of these can be bought at any regular grocery store.
You need to make sure that the potatoes are cleaned and scrubbed before they are cooked so that no dirt that gets baked into them. Baking the potato in aluminum foil helps to keep moisture in so that it ends up being softer and fluffier on the inside. You can also make baked potatoes in a convection oven and conventional oven as well as a microwave. However, if you want the best results, it is recommended that you use an oven.
Baked Potato Recipe
The following is an easy to make baked potato recipe.
Serves 4
For this recipe you will need:
- 4 Russet Potatoes
- Olive Oil (to coat the potato)
- Salt
Step 1:
Preheat the oven to 350° and place the racks on the top and bottom thirds. Clean the potatoes by scrubbing them. Otherwise, you will have dirt and residue on the skin when you eat it. After you dry the potatoes, you will want to poke 8 to 12 holes in them with a fork so that they don’t burst when cooking.
Step 2:
Put the potatoes in a bowl and lightly sprinkle them with the canola oil. Sprinkle the salt on them and, depending on your preference, you can either decide to wrap them in aluminum foil or just sit them in the oven as is. Either way, place them in the oven on the top rack (right in the middle) and set a baking pan underneath to catch any dripping.
Step 3:
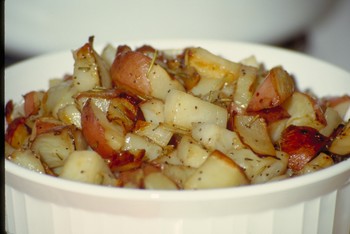
How to Bake Potatoe
Let the potatoes bake for one hour or until the skin is crispy and the inside feels soft and fluffy. Once the potatoes are done, you can cut them open with a knife or make a dotted line with a fork and press the ends together to get the potatoes to pop open. Finally, you can add butter, sour cream or any other sides to your potato.
Baked Potato Casserole
Ingredients:
- 10 russet potatoes
- 9 tablespoons of unsalted butter
- 1 cup of sour cream
- ½ cup heavy cream
- ¾ lbs. bacon cooked to a crisp and crumbled
- ½ lb. sharp white cheddar cut into small cubes
- ¾ lbs. grated mild cheddar
- 3 eggs, lightly beaten
- Salt and pepper
Step 1:
Preheat the oven to 400°. Clean the potatoes to remove any grime and dirt and dry them off. Poke holes in them with a toothpick or fork and bake them for 1 hour or until soft. Remove them and set them aside until you can pick them up without burning yourself.
Step 2:
Once the potatoes are cool enough to handle, scoop as much of the inside out as you possibly can with a spoon. Place the soft potatoes in a bowl and add 8 tablespoons of butter, sour cream, heavy cream, salt and ground pepper and mix them until smooth. Add the crumbled bacon, cubed cheddar, half the grated cheese, onions and eggs and blend until well mixed.
Step 3:
Take a 9 by 13 inch cooking pan and use the last tablespoon of butter to grease it. Turn the oven temperature down to 375° and put the potato mixture in the greased pan. Put the remaining grated cheese on top. Bake it for about 30 to 45 minutes or until golden brown on top to complete the baked potato casserole.
How to Bake Bread
In this guide we’ll show you how to make bread. Homemade bread is simple to make and far better tasting than most store bought varieties. It can also be a more economical approach. Additionally, when you read the labels of most major bread manufacturer’s loaves, it can be a little scary. It seems like the balance is slowly shifting towards a majority of ingredients that suggest heavy processing and preservation. Baking your own bread allows you to take control of exactly what goes into your food. For health conscious consumers, there are high fiber, whole wheat flours sold at health food stores that contain little or no extra additives. However, for those of you simply looking to make fresh loaves of bread, a trip to your local supermarket for prepared dough will be just fine.
How to Make Homemade Bread
Our first recipe will teach you how to make homemade bread.
Yields 1 loaf
For this recipe you will need:
- 6 cups all purpose flour
- 1 package active dry yeast
- 2 1/4 cups buttermilk
- 2 tablespoons sugar
- 1 tablespoon butter
- 1 1/2 teaspoons salt
Step 1
Combine 2 1/2 cups of flour and the yeast in a mixing bowl. In a pan over medium heat, combine the buttermilk, butter, sugar and salt. Stir it frequently until it reaches 120 degrees Fahrenheit and the butter is almost at the melting point.
Step 2
Add the liquid mixture to the bowl of flour and yeast, and combine them using a mixer set on medium speed for 30 seconds. Make sure to scrape the sides of the bowl to ensure that all of the ingredients are incorporated into the dough. Set the mixer on high for 3 minutes, once again making sure all of the flour and liquid mixture is worked into the dough.
Step 3
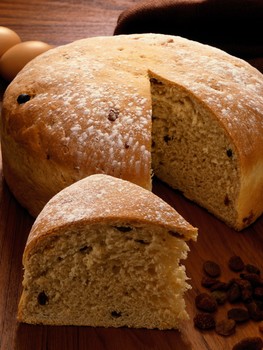
How to Bake Bread
Step 4
When the dough has doubled in size, punch it down with your fist and then tear it into two equal sized chunks. Once again, cover it with a damp cloth letting it rest for about 15 minutes.
Step 5
Once the dough has rested a second time, grease two loaf pans and shape the dough so that it will fit into said pans by rolling it and compressing it until the desired shape is achieved. Once the two dough balls are loaf shaped, place them in the pans and cover them with damp cloths. Allow them to double in size once more for about 30 minutes. While the loaves are resting, pre-heat the oven to 375 degrees Fahrenheit.
Step 6
Once the dough has rested and the oven is ready, place the loaves in the oven and bake for roughly 40 minutes or until the crust is golden brown and solid. It should have a hollow thumping sound when you tap it with your finger. Once the bread is done, take it out of the loaf pans quickly to prevent it from over cooking due to the heat of the pan and let the bread cool until it can be handled without discomfort.
There are a number of things that can be done to change the flavor and or nutrient profile of the bread. Whole wheat flour can be used but it tends to have a bitter taste to it and it also requires a bit more liquid. Adding some honey to the flour would help to neutralize the bitter whole wheat flavor. Various nuts and seeds can also be added, which contribute a pleasing texture, as well as essential fatty acids, and protein. Dried fruits such as cherries or cranberries can be added.
Another popular technique is to sprinkle a little sea salt on top of the loaf. However, this should be done with caution as too much will ruin the taste. Some people have claimed to be able to use unflavored protein powders in their bread recipes with great success.
How to Bake Chicken
Knowing how to bake chicken can be very useful because chicken is a very healthy and nutritious meat. There are many different baked chicken recipes and many different styles of cooking chicken. Chicken is such a versatile meat that some restaurants will use chicken in every dish that they serve. However, chicken is a very tricky ingredient to cook with because it dries out very easily and has a tendency to sometimes be undercooked. Many people that like eating chicken don’t like cooking it because it sometimes just won’t cook right. Chicken really is a very simple dish to prepare. The main thing to remember is to keep the chicken moist. When baking a chicken, baste it in the broth it sits in much like you would a turkey on Thanksgiving.
When you are buying chicken to cook for a meal, make sure that you aren’t getting old chicken that might have salmonella. Check the dates of the chicken you are buying. Usually, the cheaper it is the worse quality it will end up being. Also, try to find skinless chicken with very little fat because chicken fat and skin is very greasy and unhealthy. For the best tasting chicken meals, it is a better bet to go with fresh chicken rather than frozen chicken because it will have a cleaner taste and less “mushy” texture.
Baked Chicken Recipes
The following are a collection of three baked chicken recipes that include great classics such as beer roasted chicken, rosemary roasted chicken, and classic roasted chicken.
Beer Roasted Chicken
Serves 6
For this recipe you will need the following ingredients:
- 1 chicken, about 4 pounds
- 1 lime cut in half
- ½ can of beer (12 fluid ounces)
- 1 cup of water
- Salt and pepper
Step 1:
Preheat the oven to 350°. Rub the salt and pepper on the chicken, getting it spread as best as you can. Put the two lime halves inside the chicken so that the juice soaks in while baking. Set the can of beer in the middle of the baking pan and set the chicken on top of it with the can of beer going into the inside of the chicken. Pour 1 cup of water into the pan and cover the chicken with aluminum foil to lock in moisture and place the pan in the oven.
Step 2:
Cook the chicken for 1 ½ hours, making sure to take the tin foil off in the last 20 minutes. Always make sure to keep an eye on the chicken and baste it with the broth that it produces. The meat will be very tender and juicy when it is done. Before you serve, let it stand about 10 to 15 minutes.
Rosemary Roasted Chicken
Serves 6
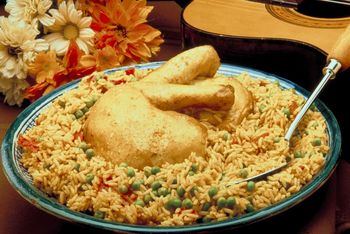
How to Bake Chicken
Here is the list of ingredients you will need for this recipe:
One 4 lb. chicken, rinsed off
- Salt and pepper
- 1 small green onion, diced
- ¼ cup chopped rosemary
Step 1:
Preheat the oven to 350°. Rub the chicken with the salt and pepper making sure to spread it evenly over the surface of the chicken. Take the diced onion and chopped rosemary and put it inside the chicken.
Step 2:
Put the chicken into a 9 x 13 inch baking pan and cook for 2 to 2 ½ hours or until golden brown. Make sure the chicken is cooked all the way through with a meat thermometer if necessary. The cooking time will be different depending on how big the chicken is.
Classic Roasted Chicken
Serves 4
Here is the list of ingredients you will need:
- 1 4lb. chicken, which is cut into 8 parts (2 legs, 2 wings, 2 breasts and 2 thighs)
- Olive oil
- Salt and ground pepper
- ½ cup of chicken broth (you could also use white wine for a different flavor)
Step 1:
Preheat the oven to 400° and make sure the chicken has been cleaned. Take a roasting pan and coat it with olive oil so the chicken doesn’t stick to it while baking. Rub the chicken in olive oil. Spread the salt and pepper onto the pieces of chicken and set the chicken into the roasting pan so that the pieces are not crowded together.
Step 2:
Cook the chicken at 400° for 30 minutes and then lower the temperature to 350° and cook for another 30 minutes or until golden brown. The chicken should be tender and juicy from the olive oil.
Step 3:
Take the chicken out of the oven and cover the pan with aluminum foil. Let it sit for 5 to 10 minutes or until cool enough to serve.
How to Bake Salmon
Given the significant rise in heart disease and chronic inflammation, it is no wonder salmon has begun to enjoy some much deserved popularity. More and more people are looking to know how to bake salmon because of its health benefits. The omega 3 fatty acids found in salmon have been proven to help fight heart disease, arthritis and many other physical ailments. While health concerns are not the only reason for salmon’s widespread popularity, it is an important factor to consider.
If you have the option to purchase wild caught salmon, do so as the feed given to farm raised salmon is often corn based. This has the potential to shift the omega 3 fatty acid content and increase omega 6 fatty acids, which are not as beneficial.
Salmon has a firm texture and the flesh is naturally pink and oily, with a fairly strong flavor. Therefore, it is important to think about the other ingredients that you are using in any salmon dish and how they will mix with the salmon’s oily flavor.
When selecting salmon filets, freshness is key. Ask your local fishmonger or seafood section attendant when it was delivered. Also, don’t be fooled by a pleasingly pink color as dye is often added to mask the visual effects of aging. The flesh should be soft and springy to the touch and the odor should be fairly pleasant. If it has a strong, sickly fishy aroma, this is a strong indicator that the fish is past its prime.
Baked Salmon Recipes
Salmon can be prepared in a variety of ways including grilling, blackening, poaching, steaming and baking. While these are all great options, baking salmon is an especially tasty route to go. The following are a couple of baked salmon recipes we hope you will enjoy.
Baked Salmon with Garlic and Rice Pilaf
Serves 2
For this recipe you will need:
- 2 8oz salmon filets
- 1/2 stick of butter
- 1 lemon sliced into thin rounds
- 2 pinches salt
- 1 pinch pepper
- 3 cloves of garlic thinly sliced
- 1 box rice pilaf
- Aluminum foil
Step 1
Pre-heat the oven to 375 degrees
Step 2
Tear two sheets of aluminum foil big enough to hold the salmon filets and other ingredients.
Step 3
Grease the aluminum foil and place the one salmon filet on each sheet. Sprinkle with salt and pepper. Rub the spices into the flesh of the salmon with your hands.
Step 4
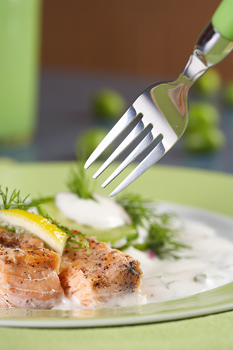
How to Bake Salmon
Cover the salmon filets with chunks of butter and evenly top the filets with garlic slices and lemon rounds.
Step 5
Wrap the salmon in the aluminum foil, forming 2 individual packets. Place the salmon packets in a glass baking dish and bake them for 35 to 40 minutes, or until the fish flakes easily to the touch. While the salmon is baking, prepare the boxed rice pilaf.
Step 6
When the salmon is done, take it out of the oven and discard the aluminum and other ingredients. Transfer the fish to a serving plate and serve with the rice pilaf.
For those wishing to make an even healthier version of the above mentioned dish, you can substitute a low fat, non-hydrogenated margarine or olive oil for the butter. Instead of placing butter chunks into the salmon packets, simply drizzle a little olive oil on them. The heart healthy fats found in olive oil pair nicely with the omega 3 fatty acids found in the salmon filets. Furthermore, feel free to experiment with herbs and spices. Adding fresh basil leaves to the packets produces nice results, as does adding a spritz of lime juice along with the lemon rounds. For those watching their carbohydrate intake, a nice green salad could be substituted for the rice pilaf, or perhaps some seasonal vegetables. Roasted tomatoes stuffed with low-fat cottage cheese would also make a suitable side dish.
Another option for quickly cooking salmon is as follows.
Blackened Salmon
Serves 1
For this recipe you will need:
- 1 salmon filet
- 2 tablespoons vegetable oil
- Seafood blackening spice
Step 1
Pour the vegetable oil in a frying pan and set the burner to high heat.
Step 2
Pour the seafood blackening spice into a large shallow dish and roll the salmon filet in it until it is evenly coated. Press the spice crust into the salmon flesh with your hand.
Step 3
Cook the salmon filet for approximately 2 to 3 minutes on each side or until the filet flakes easily.
Step 4
Remove the salmon from the pan and place on a serving dish. Enjoy with a side dish of your choice.
How to Boil a Chicken
Chicken is a very versatile type of meat that is not only particularly healthy but makes a great addition to many kinds of plates. While some may be slightly intimidated at the thought and processing of boiling a whole chicken, the steps themselves are relatively problem free as long as a few precautions are taken.
The process of boiling a chicken itself also leaves you plenty of time to prepare other portions of the meal such as a salad, vegetables or potatoes. The result always ends up in soft, easy to tear chicken that can be used in multiple applications such as sandwiches, stews or salads.
Purchasing a Proper Chicken
In any meal preparation process, it’s important to select quality ingredients in order to get the best out of your meal. Markets and grocery stores keep a variety of chickens well stocked for their customers. Broiler-fryers are some of the most common. These are 1-3 pound young chickens that derive their name from their popular use in broiling, frying and roasting. Broiler-fryers are also sold in cut up variations, which are good choices for boiling. Stewing hens are another larger variety at 4-7 lbs. These hens are most appropriate for those who really want well tenderized meat that is also great for soups and stews.
Regardless of what type of chicken you purchase, make sure that the package has a Grade A rating from the U.S.D.A and inspect both the package and the chicken. Holes and compromises on the package result in quicker spoilage and it’s best to avoid chickens that appear to have a very grey skin color. Keep in mind that a typical broiler-fryer will be good for about 3-5 servings.
Thawing out the Chicken
Chickens are usually kept frozen in order to preserve the meat. This allows you to use the chicken later on without having to strictly adhere to the expiration date. The first appropriate step is to properly thaw the chicken. The most common methods of thawing are by placing the chicken in the refrigerator or in a bowl of cold water. You will find that others may also place the chicken on a platter and into a water filled sink. If using the bowl of water method, make sure to place the chicken in a plastic bag first.
If room temperature is a problem, you will have to refill the bowl with cold water in order to properly thaw the chicken. Depending on the size of the chicken, expect a 2-4 hour waiting period before the chicken is ready to be boiled.
Necessary Equipment
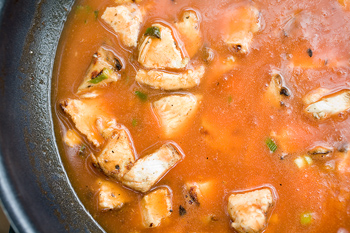
How to Boil Chicken
Before a chicken gets thrown in to boil, it’s important to be mindful about a few things. First, you’ll need the proper equipment to get the chicken to boil appropriately. Luckily, it doesn’t take much to get a well boiled chicken. You’ll need a large pot or crock pot, a meat thermometer and a stove – naturally.
Check that you have the other ingredients for your meal. It’s common to add onions, carrots, celery and potatoes to the pot with the chicken. Flavor additives such as salt, peppercorn and olive oil should also be considered.
Boiling Chicken
Once everything is ready to go, it’s simply a matter of properly boiling the chicken until its tender and flavorful. Boiling chicken starts with placing cold water into the pot that you will be using. The chicken should then be placed into the pot. Other aforementioned ingredients can also be added. Setting the stove to mid-high and covering the top of the pot with a lid will get the boiling process started.
It’s important to watch for the water to start boiling. Once you hear and see water bubbles growing in the pot, adjust the heat until its at a low or simmer setting. The goal is to get the water at boiling or near boiling without subjecting the chicken and other foods to excessive heat. This will get the chicken nice and tender.
Boiling Time length
The boiling time length will vary depending on the size of your chicken. The general rule is that a chicken will take between 40 – 60 minutes to boil. Usually, this gives people plenty of time to prepare other parts of their meal. If you’re not going to place vegetables or potatoes into the pot to boil with the chicken, now is a good time to work on the rest of the recipe if necessary.
Finished Product
While it may take 40-60 minutes for the chicken to boil, it’s never good to simply run the risk and gauge it by time alone. Using a meat thermometer takes a lot of the guessing out of the equation.
With the thermometer placed into the chicken, wait for the thermometer to stabilize its reading. Once the chicken is between 160 – 180 degrees Fahrenheit, you can turn the stove heat completely off. Double check that the chicken is complete by making a deep cut and inspecting for any pink colored meat. If it is pink, it still requires more boiling. Once there is no visible pink meat on the chicken, feel free to remove the contents of the pot and prepare the chicken to be served.
How to Boil Eggs
Boiling eggs is a fun and easy take on one of America’s most beloved animal by products. Eggs are a delicious, high protein food that provide a healthy dose of vitamin E. Egg protein is some of the highest quality protein available and is often used as the benchmark against which other forms are compared. One problem with eggs, however, is the fact that they must be cooked prior to consumption.
Furthermore, eggs usually have to be eaten immediately after preparation and, as a general rule, do not travel well. This is not so for hard boiled eggs, however. These tasty, mobile snacks can be made in advance and taken almost anywhere provided that they can be kept cool. Because of this, they are the perfect addition to packed lunches or simply as a nutrient dense snack.
Hardboiled eggs can also be transformed into a variety of tasty dishes such as potato salad. Other options include deviled eggs, egg salad sandwiches and cob salads. These are just a few of the choices involving hardboiled eggs.
Chicken eggs are by far the most common for boiling but many farmer’s markets and health food stores also sell duck eggs which are slightly larger and vary slightly in their nutritional makeup. Duck egg yolks have a higher fat content than chicken eggs and the whites of duck eggs have more protein. Because of the higher protein content in duck eggs, it is crucial that you don’t overcook them or the negative results will be similar to overcooking a chicken egg but more pronounced. Also, duck eggs will have a richer flavor than chicken eggs. One egg variety is not better than the other and it simply comes down to a matter of personal preference in regard to flavor.
How to Make a Hard Boiled Egg
This recipe will go through the process of how to make a hard boiled egg. For this recipe you will need:
- 4 chicken eggs
- A large pot for boiling complete with lid
Step 1
Spread the eggs out evenly in the bottom of a pan without stacking them on each other. Pour enough cold water into the pot so that the eggs are covered by at least an inch of water. Bring the temperature up to a rapid boil using high heat.
Step 2
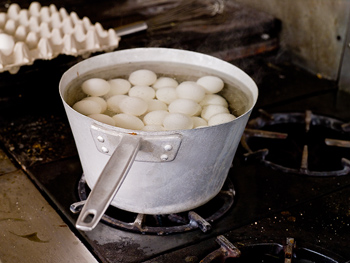
How to Boil Eggs
Reduce the heat so that the water is barely simmering. Put a lid on the pot and simmer for 15 minutes. When 15 minutes has passed, drain the water out of the pot.
Step 3
Run cold tap water over the eggs to help them cool. Another option is to place the eggs in a bowl of ice water until they have cooled enough that they can be handled. When they have cooled, drain the water once more.
Step 4
Place eggs in the refrigerator if you are not planning on consuming them immediately. When you are ready to eat them, peel the shells by gently tapping them on the countertop and rolling the egg between your palms. Pick away any of the loose shell that is still clinging on the edible interior.
Hard Boiling Duck Eggs
For this recipe you will need:
- 4 duck eggs
- 1 large pot for boiling complete with lid
Step 1
Place the eggs evenly in a large pot, without stacking them on top of each other. Cover them with enough cold water that they are submerged by at least an inch. Raise the temperature to a boil over high heat.
Step 2
Once the water has reached a rapid boil, immediately remove the pot from the hot burner and cover the pot with the lid. Allow the duck eggs to sit in the hot water for approximately 12 minutes if you are using large sized eggs. Leave them immersed for slightly longer if you are using jumbo eggs or for slightly less time if you are using medium sized eggs.
Step 3
After the appropriate amount of time has passed, transfer the eggs to a bowl of ice water and let them cool until they can be handled without discomfort. Once they are cool, place them in the refrigerator if you are not planning on consuming them immediately. Peel the shell away by tapping them on the countertop and rolling them between your fingers.
How to Cook Crab Legs
Crab legs can be a delicious, healthy dish, whose sweet flavor and delicate texture are enough to make any seafood lover drool. So much so that restaurants everywhere use them as their headlining dish to draw people in, usually for a hefty price tag.
While many people do not know how to cook crab legs, it is mostly because they appear intimidating while sitting tucked away behind the display case of the seafood section. In actuality, they are quite simple to prepare. So, the next time you’re looking to impress a date with your culinary prowess, consider making crab legs.
The first step to cooking crab legs, as with any seafood dish, is simply to make sure that what you are getting is as fresh as possible. More urban areas, as well as those close to the sea, often have fresh fish markets which haul the fresh catch in daily. These are the best places to shop for crab legs.
However, if you find yourself in an area without these amenities, you can still find good quality seafood. There is a good chance that the crab legs you will find in the seafood or freezer section are most likely pre-cooked. If this is the case, you will simply need to broil, steam or boil them. However, if you are buying whole crabs, they are likely raw and you will have to clean the crab prior to consumption.
Broiled Crab Legs with Garlic Lemon Butter
Serves 4
For this recipe you will need:
- 1 1/2 pounds crab legs
- 5 tablespoons melted butter
- 1/2 teaspoon lemon peel
- 1 1/2 tablespoons lemon juice
- Salt to taste
Step 1
Rinse off the crab legs, making sure to clean any sand or other unwanted particles from them. Dry them off with paper towels and put them on a greased baking sheet.
Step 2
Stir together the butter, lemon peel, lemon juice and salt in a mixing bowl. Cover the crab legs in the butter mixture and place them in the oven to broil.
Step 3
Broil for approximately 5 minutes or until heated completely through. Remove the crab legs from the broiler and place on a plate lined with paper towels.
While the crab leg recipe listed above is delicious by itself, here is a quick garlic lemon butter recipe to use for dipping.
Easy Garlic Lemon Butter
Serves 4
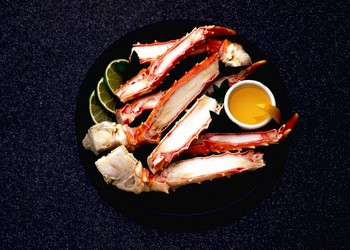
How to Cook Crab Legs
- 3-4 tablespoons butter
- Garlic pepper blend to taste
- Lemon juice to taste
Step 1
Melt the butter in the microwave or in a pan over low heat.
Step 2
Stir in the garlic pepper blend and lemon juice, tasting as you go to make sure that you don’t add too much.
Step 3
Transfer the melted butter mixture to individual serving vessels and dip the crab meat into the mixture as you eat.
There are a few different ways of cooking crab legs. Broiling crab legs makes for an easy, hassle free cooking experience, you can also boil your crab legs which some feel helps to keep the crab meat moist. The downside of this for some, however, is that water has a tendency to get into the shells and makes eating them a little bit more messy.
Boiled Crab Legs
Serves 4
For this recipe you will need:
- 1 1/2 pounds crab legs,
- Sea salt
- 1 packet crab boil (optional)
- 1 lemon cut into quarters
- Tongs
- 1 large pot for boiling such as a stockpot
Step 1
Fill your stockpot about 2/3 of the way full with water and add your salt or “crab boil.” If you are only using salt and no crab boil, you want to add enough of it so that it tastes like sea water. Add the lemon wedges to the pot and wait for the water to boil.
Step 2
Add the crab legs and boil until they turn pink, the sign that they are done. Remove them from the water and place on a serving tray lined with paper towels. Be sure to have extra paper towels ready as boiled crab legs will be a messy treat.
How to Cook Eggplant
A member of the nightshade family, eggplant is a firm fleshed produce with a dark purple skin and white spongy interior. Eggplant is a nutritious food and it’s skin has proven cancer fighting properties. Vegans and vegetarians alike covet it because of its firm meat like texture and ability to absorb flavors. Eggplant is a versatile ingredient that blends well into everything from sandwiches to stir fry and rice dishes. Furthermore, it does fine as a standalone main ingredient in entrees such as eggplant parmesan or eggplant with roasted red peppers. In this article we hope to teach you how to cook eggplant by showing you two easy eggplant recipes.
When shopping for eggplant, some things to look for include flesh that is firm yet spongy. Additionally, the flesh of the eggplant should not be too wrinkly or covered with brown pit marks or bruises. Over time, you will develop an ability to gauge when an eggplant is acceptable to purchase as opposed to when they are too old or damaged. While some people advise that you should peel the outer purple layer off of the eggplant, this ultimately comes down to a matter of personal preference.
While the outer skin is where most of the pesticides are located, it is also where many of the cancer fighting phyto-nutrients are. So, it is really a trade off. However, if you do choose to keep the outer skin on (and don’t buy organic) make sure to give it a thorough scrubbing prior to consumption. The easy eggplant recipes listed below provide fast, simple ways to enjoy eggplant.
Garlic Eggplant Sandwiches, With Roasted Tomato Aioli
Serves 2
For this recipe you will need:
- 1 large eggplant thoroughly washed or peeled
- 4 cloves garlic crushed
- 2 tablespoons olive oil, more if needed
- 1 pinch salt
- 2 pinches basil
- 1 jar roasted tomato aioli
- 1 loaf of crusty artisan bread
- Provolone cheese
Step 1
Slice the eggplant into 1/2 inch rounds.
Step 2
Pour the olive oil in a frying pan over medium heat and add the garlic and spices. Sauté until the garlic is slightly golden.
Step 3
Add the eggplant, sprinkle with the salt and sauté until tender and slightly brown.
Step 4
How to Cook Eggplant
Another fun variation on the garlic eggplant theme is to sauté the eggplant as previously mentioned but, instead of making sandwiches, make an artisan pizza using eggplant, fresh milk mozzarella cheese, sundried tomatoes and artichokes. A tomato sauce could also be used or you purchase a jar of pine-nut pesto and spread that on the crust instead. If you choose to make a pizza in this fashion, however, don’t overcrowd it with toppings. Otherwise, it won’t cook properly and it won’t taste right. Given that all the flavors used for this recipe are delicate, it’s all about balance.
Garlic Eggplant Pizza
Serves 2
For this recipe you will need:
- 1 package pizza dough mix
- 1 package fresh milk mozzarella cheese
- 1 package sundried tomatoes
- 1 jar artichokes in oil
- Garlic eggplant
- 1 jar pine-nut pesto or tomato sauce
Step 1
Pre-heat the oven to 450 degrees and prepare the garlic eggplant as previously directed. Only after it’s cooked, slice it into bite sized pieces according to your personal preference.
Step 2
Prepare the pizza dough mix according to the instructions then roll it out onto a greased pizza pan or a pizza stone.
Step 3
Spread an even amount of the pine-nut pesto or tomato sauce onto the crust, leaving a one inch ring around the edge bare.
Step 4
Break off chunks of the fresh milk mozzarella cheese and scatter them across the surface of the crust as you see fit. You want there to be a good amount of cheese but not enough so that the entire surface is taken up.
Step 5
Arrange the eggplant, artichokes and sundried tomatoes on the pizza until you are satisfied. Remember not to overcrowd your pizza or it won’t turn out right. You want to enjoy a nice balanced flavor profile.
Step 6
Place the pizza in the oven and bake for roughly 10 to 15 minutes, or until the cheese is golden and bubbling slightly. Once it is done, take the pizza out of the oven and allow it to cool before serving. Once it has cooled, cut it into equal pieces and enjoy.
How to Cook Lentils
Lentils are a very popular bean to use in many different recipes. You can use them in soups or as side dishes. In fact, they are one of the most popular beans to use in any kind of bean soup. Along with wheat and barley, lentils are one of the oldest known crops. Lentils were often served in ancient Greece as soups, much like today. There are over a hundred different kinds of lentils and about 50 are harvested for consumption. The most popular types of lentils are the red, green and brown varieties. Lentils tend to be popular because they have a nutty, earthy flavor and sometimes add a zest of pepper flavor to certain dishes. Knowing how to cook lentils doesn’t require that you learn many lentil recipes. In this guide we’ll cover two lentil recipes that should get you started.
Lentils are a unique type of bean because the older they are, the longer they take to cook. It is best to buy fresh ones from the store because it will save you cooking time. There is nothing wrong with using old lentils because the flavor will be the same but the cooking time will be the issue. Another consideration with lentils is the amount of liquid that you choose to use in any recipe. Unlike many other types of beans, using too much water can make the beans overly soggy. Because there are several different types of lentils and all of them have different cooking times, it is a wise thing to make sure you don’t cook different types in one pot. Lentils are also popular because they have a lot of protein in them and make a good substitute for any kind of meat.
Classic Lentil Soup
Serves 4
Here are the ingredients for this recipe:
- 2 cups lentils
- 3 cups water or broth (for every cup of lentils add 1 ½ cups liquid)
- 1 green onion
- Garlic
- Herbs (optional depending on tastes)
- Salt
Step 1:
Make sure the beans are clean. You can clean them by rinsing them in a strainer with cold water. Unlike most beans, lentils do not need to be soaked in water. Place the 3 cups of water or broth in a cooking pot and bring to a boil over medium heat.
Step 2:
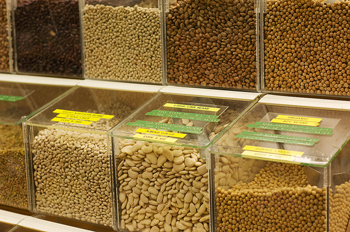
How to Cook Lentils
Add the 2 cups of lentils and any onion, garlic and herbs you chopped up. Because salt tends to harden lentils while they are being cooked, don’t add the salt quite yet. Boil at medium to high heat for 5 minutes and lower to a simmer for 10 to 15 minutes. Start tasting the lentils after about 15 to 20 minutes to make sure they aren’t mushy. Cooking time varies depending on what kind of lentil you are using. Once the lentils are the perfect texture, they are ready to eat.
Anything acidic should be added after cooking. Otherwise, it ruins the lentils. Make sure to add any lemon juice or tomatoes after they are done.
Here is a great lentil chili recipe. Lentils aren’t the most common chili bean but they do make a great substitute.
Spicy Lentil Chili
Serves 6
Here are the ingredients you will need for this recipe:
- 2 tablespoons of vegetable oil
- 1 green onion, diced
- 3 garlic cloves, diced
- 2 cup dry
- 3 cups of chicken or beef broth (cooks the same just changes the flavor)
- 2 cups of canned tomato, diced
- 4 tablespoons of chili powder
- 1 tablespoon ground cumin
- Salt and pepper
Step 1:
Rinse the lentils with cold water in a strainer. Take the vegetable oil, garlic and onion and put them into a large cooking pot and sauté them over medium heat for about 5 minutes. Don’t sauté them too long because you don’t want to burn them.
Step 2:
Add in the 2 cups of lentil beans. Add the chicken or beef broth, tomatoes, 4 tablespoons of chili powder, 1 tablespoon of ground cumin and salt and pepper. Bring the mixture to a boil and reduce the heat so that the chili can simmer for 30 minutes or until the lentils are tender enough to eat.
For more details about how to cook lentils, visit:
How to Cook London Broil
London broil is a classic dish that is served around the world, not just London. Learning how to cook London broil will allow you to create a dish that’s appreciated by many.
Before rushing off to the butcher’s shop in search of a cut of London broil, it is important to understand that the term London broil actually refers to the method in which the dish is prepared, rather than to a specific cut of meat. A London broil is any cut of meat that is marinated, broiled and then thinly sliced prior to consumption.
However, there are stores that will attach the title London broil to certain cuts of meat that they are selling. This is most likely because they feel that the cut of meat in question would make an ideal candidate for a London broil. London broil typically consists of a flank steak, which is a lean, tougher cut of meat. Therefore, it is important to tenderize it in some fashion.
There are several popular tenderizing methods for preparing a flank steak or any other cut of meat for that matter. Tenderizing mallets are small metal hammers with spikes on the end that soften the meat as you strike it with the hammer. Chemical tenderizers are available in the spice aisle of most major supermarket chains. Also, cutting the steak across the grain diagonally is another popular method for softening meat. This method does alter the appearance of the meat. Finally, simply stabbing the steak repeatedly with a fork works extremely well and requires nothing in the way of special equipment.
When shopping for a good flank steak to prepare London broil, it is important to try and find the freshest cut of meat available. Specialty meat markets often offer the best steaks. However, when you consider that most major supermarkets sell saline injected beef that is designed to tenderize the meat (making the meat heavier for an inflated price) the difference isn’t that much. The steak you choose to purchase should be bright red and springy to the touch. Meat that has begun to turn gray has been sitting for a while and should not be selected.
London Broil Recipes
Serves 1
While there are different varieties of London broil recipes we feel that this one is an easy and simple one to get you started. First you will need:
- 1 16 oz. flank steak
- 1/2 cup Italian salad dressing
- 3 tablespoons red wine vinegar
- 3 cloves garlic finely chopped
- 2 tablespoons vegetable oil
Step 1
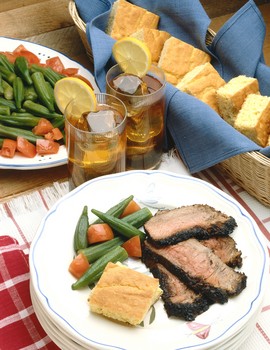
How to Cook London Broil
Step 2
Cover the meat with the marinade evenly on both sides. Cover the top with aluminum foil and place in the refrigerator for a period of one hour to over night.
Step 3
Take the steak out of the refrigerator and drain the extra marinade from the baking dish. Set the oven to broil and place the baking dish in the oven once it is hot. Broil the steak to your desired level of doneness, flipping the meat over halfway through. This should take 5 minutes per side for a medium well steak.
Step 4
Remove the London broil from the oven and transfer it onto a serving tray or plate. Slice it up into bite sized pieces and it’s ready to eat. In keeping with the guidelines that make up the dish’s namesake, make sure to slice the beef very thinly and at an angle prior to serving.
A London broil such as this would be tasty on its own or would work well in a steak salad with feta cheese, tomatoes, and croutons. A salad dressing at least similar to Italian would be recommended so that the flavors of the dressing don’t clash with those of the steak. This dish could be served with some mashed red skin potatoes and a crusty loaf of sour dough bread or some dinner rolls – any of which would make a perfect accompaniment.
As far as beverage pairings are concerned, a high quality pilsner or lager would be good choices. For wine, you could go with something along the lines of a cabernet or a pinot noir, both of which are fairly flavorful wines which stand up to the robust flavors of the steak. While the crisp hop flavors of an India Pale Ale would complement the complexity of the London broil, the hop oil tends to coat the tongue which could overpower the meat’s flavor.
How to Cook Tilapia
Tilapia is a common fish found at most supermarkets and seafood markets. It is commonly sold in filets with the bones removed, which makes it extremely easy to cook with. Tilapia is best described as having a somewhat firm, white colored flesh. It is not a very oily meat and has a mild sweet flavor. Common methods of preparing tilapia include baking, frying and grilling. When cooking with tilapia, because the flesh is delicate and not particularly oily, care must be taken to prevent it from becoming overly dry. Because tilapia does not have a strong flavor like other species of fish such as salmon, it can be prepared with a wide variety of flavorings and spices. Because of all the things this fish has to offer knowing how to cook tilapia is a useful culinary skill.
Tilapia is commonly sold frozen in individual packets. If this is the case, there is little you can do to control the quality of the fish you are purchasing. However, frozen tilapia is a pretty safe bet because it was frozen at the processing plant. This means that it has not been sitting out at warmer temperatures like fish filets that are delivered fresh. However, if you do find fresh tilapia filets, you want them to be soft and springy to the touch. If you press on them lightly and your fingerprint stays indented on the filet, it is probably too old to use.
Tilapia is a lean, healthy fish that is an ideal main course for health conscious consumers. It tastes excellent when crusted in blackening spice and thrown on the grill or when baked in the oven with a little olive oil and lime. However, if you are interested in creating a rich, flavorful dinner, baking it in the oven with a higher fat sauce will help the fish to stay moist and delicious.
For an Asian inspired meal, try making a coconut milk based sauce with a little lemon grass and ginger. Simply spread this sauce over the fish and throw it in the oven until it flakes with a fork and the sauce has reduced a bit. A dish like that could then be served over a bed of rice. Basmati is always a good choice as it is both fragrant and flavorful.
Listed below is an easy, delicious way to enjoy tilapia. Try it for dinner sometime and you won’t be disappointed.
Baked Tilapia Recipe – Orange Tilapia
Serves 6
How to Cook Tilapia
For this baked tilapia recipe you will need:
- 2 pounds tilapia filets
- 1/2 cup chopped onion
- 4 cloves finely diced garlic
- 2 1/2 tablespoons cilantro chopped
- Salt to taste
- Pepper to taste
- 1/2 cup orange juice
- 2 tablespoons lemon juice
- 2 hardboiled eggs cut into wedges
- 2 tablespoons vegetable oil
- Juice of 1 lime wedge (optional)
- Parsley to garnish (optional)
Step 1
Pre-heat the oven to 400 degrees and place the tilapia filets in a ceramic baking dish.
Step 2
Sauté the onions and garlic over medium heat (with the vegetable oil) until the onions become translucent and the garlic appears slightly golden. Take care to not have the pan too hot as this can burn the garlic, causing a bitter taste. The onions will visibly soften.
Step 3
When the garlic and onions are done, add in the cilantro, salt, pepper and pour this over the tilapia filets in the baking dish.
Step 4
Mix together the orange juice, lemon juice and lime juice in a small bowl and pour this concoction over the tilapia, garlic and onions. Make sure to cover the filets evenly. After doing this, place the dish in the oven and bake it for approximately 20 minutes, or until the tilapia filets flake easily.
Step 5
Remove the fish from the oven and place the hardboiled egg wedges overtop of the filets. Arrange filets on an appropriate serving platter and garnish with sprigs of parsley.
This dish is light, flavorful and healthy. It will pair well with a tomato, avocado and queso fresco salad. An appropriate wine selection is a nice white wine such as a sauvignon blanc. This wine will not overpower the flavors of the dish and the acidity of the wine will complement the citric acid found in the orange tilapia.
For more guides about how to cook tilapia, see:
How to Cook Trout
Trout is a popular choice among seafood lovers. Among the most popular varieties are rainbow trout (which has a soft texture, pink oily flesh and a mild yet pleasant flavor) and ocean trout (a much firmer consistency and a less oily, almost orange-hued flesh). The flavor of ocean trout is sweeter than that of its river dwelling cousin, which makes it a likely candidate for delicate sauces such as a beurre blanc.
In addition, many people prefer coral trout which, like ocean trout, has firm white flesh and a subtle flavor. Coral trout is commonly prepared by frying, baking, poaching, steaming or grilling. Ocean trout is usually prepared using the same methods as with other fish. Rainbow trout, on the other hand, is slightly more limited in its uses and is prepared by frying, baking or grilling it. Its soft, oily flesh makes it more difficult to poach or steam than the aforementioned species.
One popular way of preparing rainbow trout is to coat it in a savory batter and deep fry it. The recipe below will provide instructions on how to do just that. Furthermore, this recipe is not only meant for rainbow trout but is also fine for both ocean trout and coral trout. Remember to be careful of small bones when eating trout as they are usually present in large quantities. Vinegar helps to dissolve fish bones in an emergency but this remedy is not always completely effective.
Battered Deep Fried Trout
Serves 4
For this recipe you will need:
- 1 cup all purpose flour
- 1/2 teaspoon salt
- 1 pinch garlic powder
- 1 pinch chili powder
- Pepper to taste
- 1 cup club soda
- 1 egg white
- Oil for frying
- 1 pound of trout
Step 1
Put the flour into a large mixing bowl with the salt and pepper garlic and chili powder. Mix it together so that the spices are evenly dispersed throughout.
Step 2
With your hand, make a small depression in the center of the flour mixture and pour the cold club soda into it. Mix it together until the ingredients are just barely mixed. The batter will have small lumps in it.
Step 3
Beat the egg white until peaks appear and add it to the batter, gently mixing it in.
Step 4
Heat the oil in your frying vessel of choice. An actual deep fryer or a wok are both good choices but any large, deep vessel that won’t tip over is fine.
Step 5
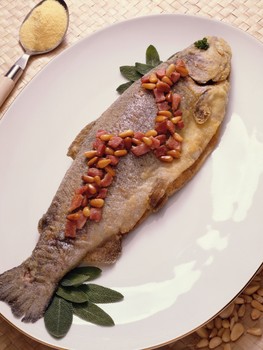
How to Cook Trout
Another option for preparing trout is to cook it on a barbeque grill. While they are more labor intensive, charcoal grills impart a smoky flavor that you just don’t get with propane. Additionally, you can add wood chips to your charcoal briquettes to make the smoke even more flavorful. However, if you don’t feel like the hassle of lighting a grill and waiting for it to heat up (or simply don’t own one) propane is fine. Here is a quick and easy recipe for preparing trout on the grill.
Grilled Trout Recipe
Serves 4
For this grilled trout recipe you will need:
- 4 trout filets
- 1/4 cup unsalted butter
- 3 tablespoons orange juice
- 2 tablespoons lemon juice
- 1 tablespoon lime juice
- Salt to taste
- Pepper to taste
- Aluminum foil
- Non-stick spray such as Pam
Step 1
Melt the butter in a saucepan over low heat or in the microwave. Stir in the lemon, lime orange juice and salt and pepper.
Step 2
Place the trout filets in the citrus butter and let them marinate for 30 to 60 minutes. Light your grill and tend to flavoring the charcoal with wood chips. If you have a propane grill, this step does not take nearly as long.
Step 3
Lay down a sheet of aluminum foil and spray it thoroughly with non-stick spray. Place the marinated trout filets on the aluminum foil and grill until flaky, brushing them with the butter mixture as you go. However, don’t brush them immediately before consuming because of the possible bacterial contamination from the raw filets soaking in the butter mixture. Once they are flaky, remove from the grill and place on a serving platter.
How to Cook Tuna
Tuna Steak has long been famous in the culinary world for its firm texture, delicate flavor and excellent plate presentation. While all of this is true, it can be difficult for the aspiring home chef to learn how to cook tuna properly. As with any seafood dish, freshness is key. Talk to your local meat market or fishmonger and ask them about what they have available in terms of freshness and quality.
Sashimi grade tuna is an excellent choice as it has been flash frozen to help prevent bacteria from forming. In regard to cooking tuna steaks, it is important to remember that a good tuna steak is seared on both sides but still pink in the middle. Trying to make it well done ruins the delicate flavor and texture of the fish and leaves it tough and harsh on the palate.
Yellow fin tuna steaks are a versatile dish that can be baked, grilled, fried, seared or eaten raw. The preferred method of cooking tuna steaks depends largely on its thickness, how fresh it is and finally, the personal taste of the cook. However, if for some reason yellow fin tuna is unavailable, swordfish makes an acceptable substitute. Once again, remember not to overcook your steaks as this ruins the quality of the dish. For the recipe mentioned below, you need to get the pan very hot as this will help the outside of the steak to become crispy while allowing the inside to remain tender.
Blackened Tuna Steak with Garlic Butter
Serves 4
Prep time: 10 minutes
Cooking time: 4-6 minutes
For this blackened tuna steak recipe you’ll need the following items:
- 4 fresh, high quality tuna steaks such as Sashimi Grade
- 2 Tbsp vegetable oil, more if needed
- 1 jar seafood blackening seasoning
- Garlic Pepper Blend to taste
- 1/2 stick unsalted butter
- Seasoned Salt to taste
Step 1

How to Cook Tuna
Pour the vegetable oil in a frying pan and turn it to high heat. It is crucial to have the pan very hot before putting the tuna steaks on because the cooking time is short. Take the 1/2 stick of unsalted butter and place it in a small dish. Mash it a until it’s flattened a bit and set it aside.
Step 2
Pour enough of the seafood blackening seasoning in a shallow container to coat the entirety of the tuna steak. Roll the tuna steak in the seasoning, pressing it into the meat with your hands.
Step 3
Place the steak into the pan and cook for 2 to 3 minutes on each side. The outside should be just cooked and the inside should still be rare. However, if you are squeamish about eating undercooked seafood, feel free to cook it for longer but it will no longer be tender. While the tuna steak is searing, place the dish containing the unsalted butter in the microwave until it is melted. Add as much garlic pepper blend and seasoned salt as you desire.
Step 4
remove the tuna from the pan and place it on a serving plate. This dish is also tasty when served over a bed of greens such as an herb salad with sliced avocado, cherry tomatoes, blue cheese and an olive oil and lemon juice dressing.
Another option for cooking tuna steaks is to marinate it for an hour in a mixture of olive oil, crushed garlic and chili paste such as Sriracha. You can then cook on a heated barbeque grill covered with aluminum foil and a non-stick spray such as PAM for about 4 minutes on each side. This could be served with a side of seasonal vegetables such as green beans or summer squash cooked in butter with a pinch of salt.
If you are seeking an even quicker method of enjoying your Sashimi grade tuna, you could always make tasty finger food by wrapping thin slices of raw Sashimi tuna around spears of fresh mango and short grain white rice and hold it in place using a toothpick. Sushi rice would be a good choice for this because it tends to be a bit stickier than other rice varieties and therefore can be molded together and not crumble apart.
For more information about how to cook tuna, we recommend:
How to Make Chocolate
Few sweets have gained such universal liking and notoriety as chocolate has. Being comprised of cocoa solids, fats and sugar, the basic form of chocolate as we know it has become a staple of desserts. It has even been embedded into traditions such as Christmas, Easter, and Valentine’s Day. This delectable cocoa derived food doesn’t have to be purchased from markets and sweet shops only. You can make your own chocolate with a few pieces of equipment and ingredients.
List of Equipment and Ingredients
- Blender
- Food Processor
- Electric Mixer
- Metal or Glass Bowl
- Cooking Sheet
- 1 lb. of Cocoa Beans
- 2 Tablespoons of Cocoa Butter
- 3 Ounces of Powdered Milk
- 3 Ounces of Sugar
- ¼ Teaspoon of Lecithin
Purchasing Cocoa Beans
Because chocolate’s main ingredient is cocoa, the appropriate beans have to be purchased to get the chocolate making process started. There are a variety of specialized chocolatiers and shops that specialize in cocoa beans.
You will be able to choose from several different types of cocoa beans such as Criollo beans, Forasteros beans, Trinitario and Nacional beans. The most commonly used are Forasteros beans. However, the Criollo and Trinitario beans should also be considered. Each type of cocoa beans carries a slightly different taste and aroma level.
Roasting Cocoa Beans
With a cooking sheet, some cooking spray and your 1 pound of choice cocoa beans, you can roast the cocoa beans with the oven in your home. Pre-heat the oven to 325 degrees Fahrenheit and place the pound of beans in to be roasted. Allow the beans to roast for 15-25 minutes while reducing the temperature from 300 over time. You will know when the beans are done as they start to crack – releasing water vapor.
Removing the Husk
Roasted beans still have a husk shell around them. This needs to be removed while preserving the actual bean. For at-home chocolate creation, the best way to remove the husk is by placing the beans onto a cutting board or pan and carefully moving a rolling pin over the beans. Take some time and carefully peel off any remaining husk on the beans.
Cocoa Liquid
Since the beans will cool down when removing the husk, you can cook the beans again for 5-6 minutes at a low temperature setting. With the food processor handy, place the beans into the processor and mix the beans. The mixing and grinding should produce a nice liquid consistency of cocoa after about 10 minutes.
Adding Ingredients
How to Make Chocolate
Conching Chocolate
Conching chocolate is the process by which the chocolate mixture is altered to create those characteristics that are so commonly related with chocolate. Pour the hot chocolate mixture into an electric mixer and set it to a low beater mode. This conching process may take as long as 30 hours.
During this process, it is important to keep the chocolate melted and warm. This can be done by either periodically stopping the mixer then heating the chocolate by oven or by using a blow dryer. Longer breaks away from supervised conching means you’ll have to place the chocolate into a pre-heated oven at 150 degrees overnight.
Tempering Chocolate
With the chocolate now conched, it’s time to do work on another time consuming part of the homemade chocolate process. Luckily, this is one of the very last steps. Tempering chocolate is what makes the difference between a chocolate that has a sheen to it and a chocolate that is dull and overly soft.
For this process, the chocolate content must be set at a temperature of about 100 degrees Fahrenheit. The bowl of chocolate should be kept at this temperature for the entirety of the process. With a spatula, take some of the chocolate and place it on a hard, non sticky surface; a table counter usually does the trick.
Spread and re-compress the chocolate with the spatula for about 10 minutes before adding more hot chocolate from the bowl and spreading and re-compressing again. Once you’ve tempered all the chocolate content, place it back into the bowl that should still have a bit of hot chocolate left in it. Slowly stir the entire chocolate content together and check the temperature. Tempering should be performed until the temperature check is less than 91 degrees.
Finished Product
You can then use molding equipment to turn your chocolate content into whatever shapes and pieces you’d like. Of course, this is not absolutely necessary. Now, the chocolate simply needs time to harden at room temperature before you enjoy your homemade creation.
How to Make Hash Browns
Hash browns are a staple of a hearty full-sized American style breakfast. They are the perfect complement to a side of eggs, toast, and sausages. However, their simple looks and appeal are rather deceiving as they are easy to mess up. Many people have found this to be true in their attempts to make perfect looking textured hash browns at home.
Homemade Hash Brown Recipe
In order to properly follow this homemade hash brown recipe you’ll need the correct equipment and ingredients. Yes, it is easier to just go down the frozen foods aisle in a grocery store and pick up the frozen, ready to cook hash browns. However, knowing how to make them yourself from scratch is not only rewarding but will allow you to spruce up a plate of hash browns whenever you like.

How to Make Hash Browns
You’ll need the following:
- Cast Iron Skillet
- 2 Russet or Red Pontiac Potatoes
- Potato Peeler
- Shredder
- ¼ to ½ Cup of Chopped Onions
- 2 Tablespoons of Oil
- Optional herbs and flavor additives
- Spatula
- Timer
- Paper Towel
Preparing the Potatoes
With all the equipment and ingredients at your disposal, the first step is preparing the potatoes by peeling them. Simply use a proper potato peeler to remove all the skin from the potatoes that you will be using. If you’re using certain potatoes such as Red Pontiac potatoes, you won’t even need to peel the potatoes.
Once they are peeled, it’s time to place them through a shredder. A normal cheese shredder works reasonably well for this job and, by the end of it all, you should have a couple of cups of coarsely shredded potatoes.
Preventing Mush Hash Browns

How to Make Hash Browns
One of the most common problems that people encounter when attempting to create perfectly crisp but not burnt hash browns is the moisture that is trapped in the potatoes. When the moisture is not taken care of in the preparation stage, you will end up with a plate of hash browns that is entirely too mushy in the center.
The secret to preventing this is by soaking up all the moisture of the potatoes after they have been shredded. Just before soaking up the moisture you have the option of washing the shreds with some water to get any skin particles out. The easiest method to remove moisture in the potatoes shreds is to lay the shreds out on a large plate or on a cutting board and pressing down on the shreds with a paper towel. Be a bit patient in this process and ensure that the moisture has been removed to get the best results.
Cooking the Potato Shreds
Pour the 2 tablespoons of oil onto the skillet. The surface of the skillet should be coated in just enough oil. Others like to use butter instead of oil but, for the best results, it’s best to use a vegetable oil, olive oil or coconut oil. Place the stove range on medium-high and wait a couple of minutes until the oil is well heated.
Layer the Potato Shreds
One way to make proper hash browns is to place the shreds onto the skillet in layers. This is not entirely necessary, as one can just put half in first, wait a bit, and then place the other half. With the stove ranges set to medium-low, place a moderate layer of hash browns onto the skillet and let it cook for about 30 seconds before adding another layer. Remember to add in any other ingredients such as onions or herbs during the cooking stage.
Flipping Hash Browns
With all of the hash browns on the skillet , you have the choice of adding salt and pepper during the cooking process or simply adding them when the hash browns are done and ready to eat. Set the timer for six minutes. This is approximately the time required to get the underside of your hash browns a nice crispy texture. Once the six minutes are up, or once the underside has a golden brown texture to it, you’re ready to flip the hash browns with the spatula. You’ll only have to flip it one time in order to get both sides golden brown.
Perfect Textured Hash Browns
Another six minutes will be needed to get the other side to turn golden brown and slightly crispy. For first timers, it’s always important to keep a close eye on the underside of the hash browns as they may begin to burn if you only rely on a timer. Potential burning can be remedied by placing your stove range on a lower setting and allowing the hash browns to simply cook for a bit longer than expected.
Once both sides are crispy and have a slightly toasty color to them, you’re ready to place it onto a plate. Remember to place a touch of salt and pepper on the hash browns if you did not place any when cooking the hash browns.
How to Make Ice Cream
Ice cream is a dessert type that is great for nearly all occasions. It can be particularly delicious as a special summer treat. While most resort to manufactured ice cream that can be purchased at a market or at a ice cream shop, it can also be made at home with a couple of pieces of equipment and some common ingredients.
Homemade Ice Cream Recipes
Homemade ice cream recipes come in different varieties, each can be made in a couple of different ways and by using their own processes. The two most common homemade style ice creams are custard and non custard style ice cream. For both types, the freezing portion of creating ice cream is very important and can be performed in several different ways. The most common homemade freezing method is by using an electric ice cream maker. However, freezing ice cream can also be performed without an ice cream maker.
Equipment and Ingredients
Ice cream making will require the following:
- Ice Cream Maker: With or without built in freezing unit
- Glass Bowl
- Large Sauce Pan
- Wooden Spoon
- Plastic Container
- Ice Cream Scoop
- 1 ½ Cup of Milk
- 1 Cup of Sugar
- 2 Eggs
- 1 Cup of Cream
- 2 Teaspoons of Vanilla Extract
Creating Custard Style Homemade Ice Cream
To get started, the 2 eggs need to be whisked. As the eggs are whisked, add in dashes of sugar until the substance is completely yellow and bubbly. With the eggs getting whisked, place your 1 ½ cups of milk in the sauce pan and set the stove on medium heat until the milk is simmering. Once this occurs, take the sauce pan away from the heat source. You can also include a bit of salt and sugar into the milk.
Mixing the Eggs and Milk
With the milk simmered, slowly add it to the whisked eggs. It’s important to keep whisking the eggs as you add milk. Otherwise, the eggs will start to scramble and the milk may begin to curdle. Because of this, it pays to be patient with adding the milk or have someone else add the milk while you concentrate on whisking the egg.
Custard

How to Make Ice Cream
Chilling and Aging
Custard requires cool temperatures and time in order to provide the best mixture and texture to make ice cream. The custard should be cooled at room temperature when it is finished being heated. Then, it should be chilled in the refrigerator for 24 hours.
Adding the Ingredients
With a glass bowl full of well aged custard, you can now take another spoon and mix the 1 cup of cream and 2 teaspoons of vanilla extract. Stir the mixture enough so the cream and vanilla extra have blended in with the custard.
Freezing Homemade Ice Cream
A nice chilled custard base with cream and vanilla extract allows you to focus on turning it into actual ice cream by using an electric ice cream maker. The precise method of freezing the ice cream will depend on what make and model ice cream maker you are using. Always cross compare homemade ice cream recipes with the instruction manual of your ice cream maker to get the best results.
Place the entire content of the custard mix into the ice cream can. Most ice cream recipes may be more than enough to fill the can. However, only fill up the can to the designated marker usually located on the inside of the can. Space needs to be reserved for the expansion that will take place.
Setting Up the Ice Cream Maker
Some ice cream makers will have their dasher built into the cover of the can while others will require you to place the dasher in first and then the cover on top. Make sure that the dasher stem is exposed at the top of the cover. Once the motor drive is set into place, the ice cream is almost ready to be churned.
Follow the specific ice cream maker instructions that may require you to plug in the freezing unit and pack in ice and salt around the ice cream can.
Ready to Eat Homemade Ice Cream
Check the mixture to make sure it is a cold and has a thick consistency that will still be quite soft. The mixture should then be ready to be removed from the can and placed into a plastic container. If you want homemade ice cream with a bit more flavor, it’s best to add it in now before starting the final freezing stage.
Use a spatula or large wooden spoon to firmly pack the ice cream into the container while still leaving ½ to 1 inch of space for expansion. Let the container freeze for at least 4 hours and you should then have ready to eat homemade custard style ice cream.
How to Make Pancakes
Pancakes are one of the most popular breakfast foods in the world. They are so popular that many countries have their own varieties. The most popular versions are the basic pancake that everyone is familiar with and crepes. A crepe is just a very thin pancake that is cooked on both sides and rolled up and eaten. In the United Kingdom, pancakes are made with plain flour so they don’t rise at all. They look flat and are very white in appearance. The American version of the pancake is made with a rising ingredient to make them look fluffier and brown when cooked.
Pancakes can be made as plain, flat pieces of bread or you can add any number of ingredients to them. Some people add strawberry syrup, blueberry syrup, chocolate chips, whipped cream, apple syrup, powdered sugar and apricots or peaches. Pancakes are so versatile with any kind of sweet ingredient that you can add almost any kind of fruit and they will taste good. The most popular way to eat pancakes is with maple syrup and butter. Many people spread butter on the pancakes and then pour syrup over them. Of course, the best maple syrup to use is real maple syrup because it doesn’t have added sugar and it is all natural.
Easy Pancake Recipe
Serves 2
Here are the ingredients you will need for this easy pancake recipe:
- 2 cups flour
- 2 tablespoons sugar
- 4 teaspoons baking powder
- ½ teaspoon salt
- 2 eggs, beaten
- 2 cups milk
- 4 tablespoons vegetable oil
Step 1:
Mix the flour, baking powder, salt and sugar in a large mixing bowl. Make sure to mix it thoroughly with a fork or whisk as you want the mixture to be even. In another mixing bowl, add the two beaten eggs with the milk and vegetable oil making sure that the mixture is thoroughly mixed as well.
Step 2:
Once the eggs and milk and vegetable oil are mixed well, add them to the dry ingredients and mix them with a fork or whisk for about 1 to 2 minutes. The mixture should appear to be a little bit lumpy when you are done.
Step 3:
Heat up your griddle or metal skillet to medium heat. Put a tablespoon of butter onto the griddle or skillet so that the pancakes don’t stick. Once a drop of water sizzles when dropped onto the griddle or skillet, it is ready for the pancakes. Pour enough batter onto the heated surface so that the pancake is about 4 inches across. They can be bigger if desired but 4 inches is the easiest to cook.
Step 4:

How to Make Pancakes
Chocolate Chip Pancakes
Serves 4
In order to make chocolate chip pancakes you’ll need these ingredients:
- 1 ½ cups of flour
- 2 tablespoons of sugar
- 2 teaspoons of baking powder
- ½ teaspoon of baking soda
- ½ teaspoon of salt
- 1 ½ cups of milk
- 2 eggs, beaten
- 1 teaspoon of vanilla
- 2 tablespoons of vegetable oil
- ½ cup of chocolate chips
Step 1:
Mix the flour, baking powder, baking soda and salt in a large mixing bowl. Make sure that it is very well mixed with a fork or wire whisk. Make a hole in the middle and add the milk. Continue to mix. Add the vanilla, oil and 2 eggs and make sure that it is mixed until it is relatively thick. Just as with regular pancakes, the mixture should appear to be slightly lumpy.
Step 2:
Heat your griddle or frying pan to medium and put a tablespoon of butter on it. When the griddle or frying pan is hot, add some of the batter. Add enough to make a pancake 4 inches across. After you pour the batter, sprinkle some chocolate chips on it. Once the pancakes start to turn golden brown underneath it is time to flip it. When both sides are golden brown the pancake is done. Repeat this process until you have the desired amount of pancakes.
How to Make Sushi
Sushi has been garnering some much-deserved popularity. Light, easy to prepare, healthy and flavorful are just some of the things that describe this Japanese delicacy. While more people are trying sushi every day, it appears that many of them limit their experience to dining out, which quickly becomes too expensive for most. What exactly constitutes sushi? Where can you find ingredients? Is it safe to eat? Questions like these often prevent curious newcomers from venturing out and attempting to try their hand at preparing this somewhat enigmatic dish.
Maki Zushi is probably what comes to mind when the average person thinks of sushi. This style consists of toasted Nori (covered by rice and fillings) which is then rolled up and sliced into bite-sized pieces.
The nature of sushi is such that the flavor of the ingredients really shine through and are not masked by heavy spices. Therefore, freshness and quality are essential to preparing a successful sushi roll. Another important consideration is the quality of seafood you select. When shopping for seafood, purchase Sashimi grade whenever possible as it has been flash frozen which helps to kill harmful bacteria instead of using heat. Never use seafood that has a strong “fishy” odor as this is a sign that it has been sitting for too long and is unsuitable for consumption without cooking.
Rice is another crucial element to sushi preparation. Sushi rice is the best choice as it has a very high gluten content and short grain size. It is commonly available at specialty markets and health food stores as well as the ethnic food section of many major supermarkets. The recipe below makes a large batch so you can make a variety of rolls depending on how much rice you like to put in your rolls. When making sushi rice, it is best to prepare it using an electric rice cooker.
How to Make Sushi Rice
Understanding how to make sushi rice is essential when preparing sushi. Here’s what you will need:
- 4 cups sushi rice
- Water as directed for short grain rice
- 3 cm kombu- a japanese flavoring agent
- 90 ml. Japanese Rice Vinegar or slightly more to taste
- 55 gm. sugar or slightly more to taste
- 15 gm. salt or more to taste
Place the uncooked rice grains in a bowl and cover them in water. Briskly run your hand through the rice grains to wash off the dust that is on the rice. The water will turn cloudy. Pour off most of this liquid but retain a small amount: about 3/4 of a cup. Repeat this procedure 2 more times and drain the rice. Place the rice in the cooker along with the appropriate amount of water and kombu and cook until done. While the rice is cooking, dissolve the salt and sugar in the vinegar over low heat on the stove. Remove from heat as soon as it’s dissolved.
How to Make Sushi
Immediately spread the rice out in a shallow container without letting it cool. Pour the vinegar mix over a spatula or other wide utensil to evenly disperse it over the rice. With your spatula, mix the vinegar thoroughly through the rice using side-to-side motions with the narrow edge of the utensil to separate the rice grains. After the rice is evenly coated (and not clumpy) spread it out thinly across the container and fan it until it is cool. Flip the rice over and fan the bottom side of the rice. Do not let it cool of its own accord. Transfer the rice to a smaller bowl and cover it with a damp cloth.
Tuna Rolls
Serves 4
In order to make tuna rolls you’ll need the following:
- 2 squares of toasted Nori
- 4- 2 inch strips of raw Sashimi Tuna
- Sushi rice
- 1 3/4 tsp. wasabi paste or more to taste
- 1 bamboo sushi mat
Step 1
Cut the toasted Nori in half lengthwise and place them next to your sushi mat.
Step 2
Place one of your 4 Nori half sheets on the mat, taking care to put the shiny side down.
Step 3
Dampen your hands with a little of the rice vinegar, which will help you to handle the rice. It’s helpful to keep a tiny dish of this next to your workstation. Spread a thin layer of the sushi rice evenly onto the Nori, covering it from end to end but making sure to leave a little room at the top and bottom so that the roll can be wrapped.
Step 4
Make a small groove in the center of the sushi and spread a little bit of the wasabi paste in it. Use it sparingly as the flavor is extremely pungent. Newcomers should put a little on their finger and try it before applying it to their roll so they don’t accidentally overdo it.
Step 5
Place one of the tuna strips in the groove with the wasabi and make sure that the Nori is parallel with the edge of the sushi mat.
Step 6
Keeping the fillings in place, take the edge of the sushi mat and place it beyond the Nori sheet until the rice begins to touch. Begin rolling the sushi, exerting gentle yet firm downward pressure until it has formed a tight roll. Squeeze it and gently pack the ends with your hands to make sure the ingredients won’t fall out.
Step 7
Using a knife moistened with a little vinegar to cut the roll into 6 bite size pieces. Repeat with the remaining Nori sheets.
Note: The above sushi rice recipe will yield a large batch. To compensate for this, you can either make more sushi rolls or simply reduce the recipe as they see fit. The vinegar dressing ingredients are approximations and you should rely on your personal taste.
To learn more about making sushi, visit:
How to Roast Garlic
Garlic is a healthy and pliable vegetable that has a vast amount of applications in cooking and seasoning. One of the best ways to prepare garlic is to roast it as this helps the vegetable to retain most of its natural flavor. Roasted garlic doesn’t have the potency that raw garlic does but it tends to be juicier and has more flavor. Garlic can be used on many different foods including meat, fish and breads. On top of being able to use garlic with almost any type of food, you can use it in many different ways as a seasoning or spread.
There are many different ways you can roast garlic. The most common method is to use the oven and bake. Another way is to grill it. If you try to grill it, you need to make sure that you don’t burn the garlic as it will be ruined. A third way that you can roast the garlic is by sautéing it in a frying pan. This method takes longer but you will get the same results. Roasting garlic is easy enough that anyone can do it.
When you buy garlic, you might think that you need to use it right away. That isn’t the case, however. You can store roasted garlic in the fridge (in a container) or you can freeze it. If you freeze the roasted garlic, it is best to use it in sauces and marinades simply because the texture will be slightly different.
Roasting garlic is an easy process as long as you don’t over complicate it. These recipes will help you learn how to roast garlic and do it successfully every time.
Roasted Garlic Recipe
Here are the ingredients you need for this roasted garlic recipe:
- 1 clove of garlic
- Olive Oil
Step 1:
Preheat the oven to 400° and make sure that the garlic is peeled except for the skin on each individual bulb. You can either choose to separate the bulbs or keep the whole clove intact. Cut the top (pointed end) off of the garlic cloves and cover them in olive oil.
Step 2:
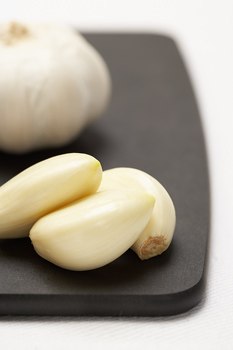
How to Roast Garlic
Here is an alternate recipe for roasting garlic. It includes the same ingredients but it is cooked in a different way.
Roasted Garlic (alternate recipe)
Here are the ingredients for this recipe:
- 1 clove of garlic
- Olive oil
Step 1:
Preheat the oven to 375° and make sure to peel the husk off of the garlic clove. Place the garlic clove in a baking dish and pour ¼ cup water in the bottom. Coat the garlic clove in olive oil.
Step 2:
Cover the baking dish with aluminum foil. Put the bowl in the oven and baste it after it has been in the oven for 30 minutes. Bake the garlic until soft.
This next recipe for roasting garlic is a bit longer but, when all is said and done, you will have roasted garlic that is much more juicy.
Roasted Garlic in a Frying Pan
Here are the ingredients for this recipe:
- 1 clove garlic
- Olive oil
Step 1:
Separate the clove of garlic into the separate bulbs and cut the tops (pointed ends) off the garlic while leaving the papery skin attached. Place them in a small frying pan and pour in a small amount of olive oil, just enough to make sure they are covered. If there is a layer of olive oil on the bottom of the frying pan, you put in too much.
Step 2:
Put the lid on the frying pan and set the burner to the lowest setting. Simmer for 40 minutes. Make sure to stir the garlic around occasionally so that it doesn’t burn to the pan. Once the garlic is done, let it sit with the lid off for about 5 minutes.
This recipe will give you the juiciest garlic with the most flavor. You can use it with anything as flavoring or, if you prefer, you can eat it by itself.
How to Cook an Artichoke
Of all the vegetables in the produce aisle, the artichoke remains one of the most intimidating and puzzling in regard to preparation methods. With its tightly closed leaves and sharp barbs, it could be considered to be “nature’s Rubik’s cube.” It is for these reasons that many shoppers prefer to skip the hassle of preparing a fresh artichoke and head straight for the canned goods aisle to purchase a can of artichoke hearts. However, the flavor of freshly prepared artichokes vastly surpasses that of the mushy, processed, canned variety.
Artichokes can be used as a finger food when served with a variety of dipping sauces, making them ideal for parties or other large gatherings. The heart of the artichoke also works well on pizza, pasta or any number of dishes. They also taste great blended into sauces such as aioli or pesto. Hour devours can be quickly made consisting of fresh artichoke, fresh basil leaves and fresh milk mozzarella cheese. Simply take a cube of cheese, place a small basil leaf on it and top it with a little fresh artichoke.
When shopping for artichokes, it is important to look for bright green, heavy specimens whose leaves are tightly closed. Another way to test for freshness is to touch the leaves, which should squeak when you touch them. As with any fresh meat or produce, freshness is key to the overall quality of the dish you are preparing. Take your time and carefully look through the available artichokes. Your diligence will be rewarded in the end.
How to Prepare an Artichoke
For this recipe you will need:
- 1 medium sized artichoke
Step 1
Cut off the thorny tips on the artichoke petals with a sharp pair of scissors. Next, snip off about an inch off the top of the artichoke. Trim off any excess stem on the bottom of the artichoke as this is fibrous and bitter. Wash the artichoke using cool water. Take care to rinse away any of the excess thorns or other unwanted debris. Trim off any smaller petals near the base of the artichoke.
Step 2
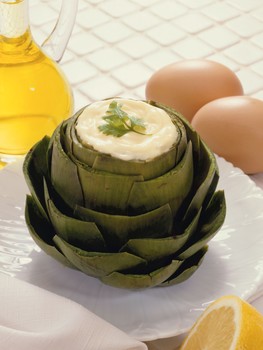
How to Cook an Artichoke
A variation on the steaming process is to add various spices and other flavoring agents to the boiling pot. Fresh garlic, basil, onions, bay leaves and lemon all add unique flavors to the artichoke. Don’t be shy with the spices as the flavoring will be subtle due to the fact that that the artichoke is not directly immersed in the flavored water.
How to Eat Artichoke
If you’re unsure about how to eat artichoke we recommend you follow these steps.
Step 1
Pull off one of the petals of the artichoke. You will notice that the inner end has a white meaty texture to it while the end you are holding is more fibrous. Take the soft white end and dip it into a sauce of your choice such as melted butter or a sun dried aioli.
Step 2
Place the dipped end between your teeth and gently pull the petal away from you so that the soft meaty flesh is scraped off into your mouth. Do not eat the entire petal as the tougher portion should be discarded.
Step 3
In order to get at the coveted artichoke heart, take a spoon and scrape away the fuzzy section of the artichoke and discard it. The meat located beneath the fuzzy part is what you are after. Cut the heart into bite sized pieces and dip it into the sauce you have selected for the artichoke petals.
How to Cook Asparagus
Asparagus is usually considered to be an elegant vegetable. Unless you make asparagus yourself, the only place that you will find it as a regular menu item is in fancier restaurants. People tend not to cook asparagus very often because it is a tricky food to prepare. It is hard to get it to have that perfect crunch to it. Usually people overcook or undercook it. When you buy asparagus, you don’t want to buy any that are flaccid or yellow looking. The best asparagus has a nice dark green color. It is also stiff with compact ends. The problem with asparagus is that is tends to go bad in a matter of days rather than lasting a week like most vegetables.
When learning how to cook asparagus you should consider using the wild grown kind. Wild asparagus is the best type to use when cooking. Asparagus tends to be expensive at stores because it has a very short season and it is a very hard vegetable to grow. However, if you can find some asparagus that is decently priced and fresh, you and your dinner guests are in for a real treat.
This recipe for classic cooked asparagus is a very easy recipe. There aren’t a lot of ingredients and it doesn’t require much prepping at all.
Classic Cooked Asparagus
Serves 3
In order to prepare this cooked asparagus recipe you will need the following:
- 1 lb. of fresh asparagus
- 1 tablespoon of unsalted butter
- Salt and ground pepper
Step 1:
Clean the asparagus to remove any dirt. Put the 1 tablespoon of butter into a frying pan and melt it over medium heat. Once the asparagus is clean, it will snap, not cut. Put it in the frying pan.
Step 2:
Spread the asparagus around so that the butter gets evenly spread. Let it cook for about 3 minutes and add the salt and pepper for flavor. Let it cook for another 7 to 10 minutes or until crispy on the outside and crunchy on the inside. If you prefer the inside to be soft, cook it for 12 to 15 minutes.
This next recipe is an alternative way to cook asparagus. The most common method is to fry it in a frying pan but you can also bake it in the oven. This next recipe tells you how to do that.
Baked Asparagus with Soy Sauce
Serves 3+
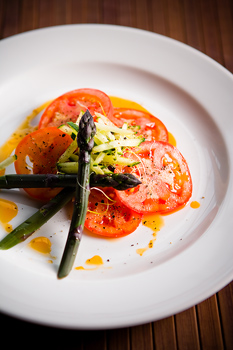
How to Cook Asparagus
Here are the ingredients for this recipe:
- 1 lb. of fresh asparagus
- Olive oil
- Salt and pepper
- Soy Sauce
Step 1:
Preheat the oven to 350° and clean the asparagus before starting anything else. Take a baking sheet and spread olive oil evenly over the entire surface. Place the asparagus on the sheet. Sprinkle the asparagus with olive oil and spread the salt, pepper and soy sauce over it.
Step 2:
Put the asparagus into the oven and cover with aluminum foil. Let it bake for 15 to 20 minutes or until the desired crispness is achieved. Take them out of the oven and let them stand for about 5 minutes.
Another popular way to cook asparagus is to cook them on a grill. Many people who do this either set them directly on the grill or put down some aluminum foil. The choice is really up to the person who is cooking it. You must be careful when using a grill because it is easier to burn the asparagus. For the best results, keep the asparagus on the outer edge of the grill.
Grilled Asparagus
Serves 3+
Here are the ingredients you will need:
- 1 lb. of fresh asparagus
- Olive oil
- Salt and pepper
Step 1:
Marinate your asparagus in the olive oil and salt. You don’t want to add too much olive oil, just enough so that the salt and pepper can stick to the asparagus. Do not marinate it too long; just long enough for the asparagus to become slightly tender.
Step 2:
Place the asparagus on the grill, making sure to put it around the edge of where the heat is coming from. Otherwise, it will burn or not cook evenly. Make sure to keep an eye on the asparagus and flip it so it cooks on all sides. You should only have to cook the asparagus for 7 to 10 minutes before it is done. However, the cooking time can vary depending on your preferences. Once it is done, let it sit for 5 minutes before serving.
For more information about how to cook asparagus, visit:
How to Cook Butternut Squash
The consumption of squash dates back to about 3000 BC. It was commonly consumed by Native Americans but some historians disagree on the belief that it originated in America. It wasn’t heavily consumed as a side dish until about the 19th century when it became popular in both Europe and the United States. Many people don’t like squash because it has a unique texture and flavor. An important thing to consider when learning how to cook butternut squash, is that cooking it too long can easily ruin the flavor and texture. Even some well known restaurants are known for not having squash on the menu because of the quirkiness of the vegetable.
Butternut squash is the most popular of the squash family and most commonly consumed during the autumn season at such occasions as Thanksgiving. Butternut squash is planted during the summer but should not be picked before it reaches its full color, which tends to be tan to very light orange. The butternut squash is known for its sweet flavor and is commonly used in soups and baked goods However, it can also be combined with sweet potato and pumpkin dishes or presented as its own side dish. One of the reasons that butternut squash is so popular is because it can be used in a variety of applications. It will taste good roasted, baked and steamed.
The next passages we will introduce two easy to make butternut squash recipes.
Baked Squash and Brown Sugar
Serves 6
You should notice some similarities between the two butternut squash recipes. Both will require butter and brown sugar.
Here are the ingredients you will need for this recipe:
- 1 large butternut squash
- 2 table spoons butter
- ¼ teaspoon ground nutmeg
- ½ cup chicken broth
- ¼ cup brown sugar
Step 1:
Preheat the oven to 400° before. Cut the squash in half lengthwise. Place it on a large baking sheet with the outer side down and bake until the inside is tender. Once it is done, remove and let stand for 5 minutes. Take a spoon and scoop out the inside before placing it in a large bowl.
Step 2:
Melt the butter in a medium sauce pan and add the nutmeg and brown sugar. Mix that with the squash in the mixing bowl. Add the chicken broth. Mash the mixture up and make sure it is well mixed into a fine puree. Place it back in the saucepan and heat it over medium heat until warm.
This next recipe can be used as a type of appetizer at a party. It shows why butternut squash is considered versatile.
Butternut Squash Bites
Serves 6+
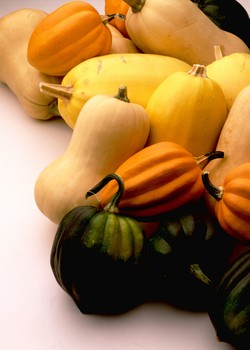
How to Cook Butternut Squash
- 1 large butternut squash
- 2 tablespoons brown sugar
- 4 tablespoons butter
- ¼ teaspoon salt
Step 1:
Preheat the oven to 375°. Cut the butternut squash right down the middle, lengthwise with a knife. Scoop out small bite sized pieces of the squash with a spoon (use a teaspoon if one is available). Try to leave as little squash as you can.
Step 2:
Spread the pieces on a baking sheet and cover them with brown sugar and salt. Melt the butter and pour it over the top of the squash. Place a sheet of aluminum foil over them and bake for 35 minutes.
Baked Butternut Squash and Brown Sugar Halves
Serves 6+
Here are the ingredients for this recipe:
- 3 medium to butternut squash (can be more depending on how many people are eating)
- ¼ cup brown sugar (optional)
- 2 tablespoons unsalted butter
- ½ teaspoon cinnamon
- ¼ teaspoon ground cloves (optional)
Step 1:
Preheat the oven to 350°. Wash the squash well to remove any dirt and grime. Cut the squash in half lengthwise and remove the seeds. Place the squash, cut side up, on a baking sheet.
Step 2:
Combine the brown sugar, cinnamon, butter and cloves in a mixing bowl. Put some of the mixture into the squash halves. Cover them with aluminum foil and bake for 40 minutes.
Step 3:
Stir the brown sugar mixture and bake for another 15 minutes uncovered. You can sprinkle it with additional brown sugar and cloves for more flavor. Let it stand for 10 to 15 minutes before serving.
How to Cook Couscous
Couscous is a granular pasta derived from semolina wheat. It is prevalent in Moroccan cooking and is both flavorful and nutritious. Preparing couscous is similar to preparing rice or pasta. It essentially involves softening the granules with a hot liquid such as water or a flavored broth. Couscous is carried in most major supermarket chains as well as in health-food stores where it is often sold in the bulk section. This is probably the cheaper method to go, especially if you know that you are going to be preparing couscous frequently.
Couscous has a rich, nutty flavor and makes a good side dish for fish and other seafood dishes, as well as for more substantial fare such as lamb. If the main course is spicy, couscous is a good side dish to prepare to counteract some of the spice. However, as a main course, it makes for flavorful, filling meals that are relatively quick and easy to prepare. It can be mixed with a variety of spices, cheeses or other flavoring agents to tailor it to the specific tastes of the chef.
Listed below are a few ways to prepare couscous. Once you get a feel for the general procedure, feel free to experiment with things such as substituting chicken or beef broth for the water used in cooking couscous. You may also grate some of your favorite cheese over top of the finished couscous and drizzle a little olive oil over top with a few pinches of sea salt and fresh cracked black pepper.
How to Make Couscous
In this article we’ve listed 2 couscous recipes. For this recipe you will need:
- Couscous
- Water
- A pot complete with lid
- Salt to taste
Step 1
Add the couscous and water in equal parts into a pot and bring the mixture to a boil.
Step 2
Once the mixture is boiling, turn off the heat, put the lid on the pot and let the mixture sit for roughly 6 minutes.
Step 3
Once 6 minutes has passed, remove the lid and fluff the couscous up with a fork or other utensil. Sprinkle with the salt and transfer to a serving bowl.
While the above recipe is exceedingly quick, simple and hassle free, there are other, more exotic couscous recipes that are pleasing to the palate. An example of this is listed below. The next time you feel like cooking something different for dinner, give this recipe a try. This recipe consists of taking a spicy stew and steaming the couscous above the pot so that, while the stew is simmering, the couscous is steaming simultaneously. Once the couscous is cooked, place it on a plate and form a well in the center of the couscous. You will pour the stew into this well.
Spicy Couscous
Serves 4
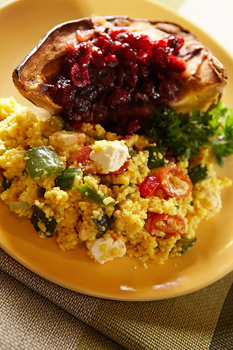
How to Cook Couscous
For this recipe you will need:
- 1 pound couscous
- 4 tablespoons olive oil
- 3 carrots thickly chopped
- 1 onion chopped
- 1/2 jar baby corn
- 4 small new potatoes chopped
- 1 small eggplant chopped
- 1 fennel bulb thinly sliced
- 2 inches fresh ginger chopped
- 4 cloves crushed garlic
- 1 teaspoon ground turmeric
- 1 tablespoon ground coriander
- 1 1/2 teaspoon cumin
- 1 teaspoon ground cinnamon
- 5 tablespoons lentils
- 1 14 oz can chopped tomatoes
- 4 cups vegetable stock
- Salt and pepper to taste
- 3 tablespoons raisins.
- Lime juice to taste (optional)
Step 1
Soak the couscous in cold water for 12 minutes. After soaking it, drain it and spread it evenly across the tray for about 20 minutes, mixing it intermittently with your fingers to encourage it to dry.
Step 2
During the drying period, put the oil in a pot and sauté the vegetables for 12 minutes or so, stirring occasionally to keep them from burning.
Step 3
Add the garlic, spices and ginger mixing it in thoroughly. Cook for a few more minutes before stirring in the tomatoes, raisins and lentils, salt, pepper, lime juice (if you choose to use any) and vegetable stock.
Step 4
Raise the temperature to a boil. Once the stew is boiling, reduce heat and allow it to simmer. Place the now dried couscous in a steaming apparatus on top of the stew.
Step 5
Cover the steamer and allow the stew and couscous to simmer for roughly 20 minutes or so. You will know the couscous is ready when it is soft and plump and you can fluff it easily. Fluff it with a fork and remove it to a serving dish. Pour the stew into a separate bowl. Make a mound of couscous on your plate with a well in the center and pour the stew into it. This recipe pairs well with a nice lager, which won’t clash with the spices.
For more information about couscous recipes, see:
