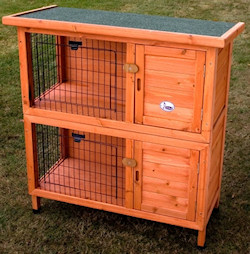
How to Build a Rabbit Hutch
Rabbits need somewhere to live that not only keeps them safe from the elements such as rain, snow or heat, but also from unwanted wildlife such as foxes. Learning how to build a rabbit hutch is surprisingly easy, simply follow the six steps below:
Deciding How Large Your Rabbit Hutch Needs to Be
First you will need to decide how big your rabbit hutch needs to be depending on how many rabbits you are intending on housing. The minimum size of the cage should be approximately four or five times the size of the rabbit.
Building Rabbit Hutches
Now that you’re ready to begin building rabbit hutches, you will need several 2×4 boards. Cut four boards to 48” long and eight to 24”. Make sure you nail the 24” to the last 2” of the 48” pieces. Make a rectangle using two of the 48” boards and two 24” boards.
Next, nail 24″ board to each corner of the frame. The boards should point upward toward the ceiling. Nail the boards so that the 4″ widths are facing you from each of the four corners. Now you will need to nail the remaining 24” and 48” onto the top of the up facing boards. You should end up with a rectangular cuboid.
Attaching Walls to the Rabbit Hutch

How to Build a Rabbit Hutch
Cut two 2” square pieces of 3×4″ plywood and attach these to the square ends of the hutch with nails. Make sure that the nails are at regular intervals to ensure that the sides are secure.
Cut three rectangular pieces of plywood to 24″x48″ and nail them to the back, top and bottom of the hutch.
Building the Door
Cut two lengths of 1″x2″ board to 46″ each. Cut two lengths of the same board to 24″ each. Attach the 24″ lengths to the ends of the 46″ boards to form a rectangle of 46″x24″.
Cut a piece of plywood to 23″x 24″. Nail the plywood to the right half of the 1″x2″ rectangle. Cut a piece of chicken wire to 23″ x24″. Nail or staple the chicken wire to the right half of the rectangular door.
Attach the hinges to the 46″ long top of the door. Attach the other ends of the hinges to the 2″x4″x48″ board that faces the front and the door of the cage will swing upwards. Attach the hook and eye latching mechanism.
Adding the Legs
Turn the cage upside down. To the corners of the 2″x4″ frame, nail 48″ long 2″x4″s so that they reach upward toward the sky. Be sure that the legs are of equal length, so that the cage sits evenly on the ground.
Finishing Touches
Now that you know how to build a rabbit hutch, it’s time to consider some finishing touches. Staining or painting the outside of the hutch is recommended, not only so that it will look more attractive but also to protect the wood and ensure the hutch lasts much longer. It may also be advisable to make a partition with a hole big enough for the rabbit to fit through.
