How to Build a Mousetrap Car
If you’ve reached this page it’s likely that you’ve been wondering how to build a mousetrap car. The steps are simple and only require a few supplies. Keep reading to learn more about how to build a mousetrap car.
Building a Mousetrap Car
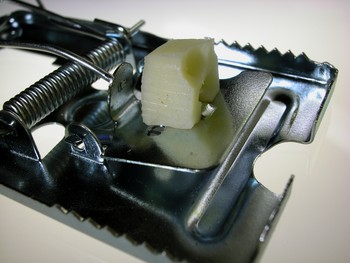
The first step in building a mousetrap car is creating a chassis, which will be the supporting frame and act as a base for the mousetrap. It needs to be approximately one inch wider and longer than the mousetrap base. It will also hold the wheels that will be added to create the car design. The chassis will need pre-drilled holes where the currently inactive mousetrap is to be secured. Once these are done, pre-drill matching holes in the mouse trap base, align the two and secure the mousetrap onto the chassis.
Adding Your Wheels
You need to choose a lightweight material to build the wheels for your mousetrap car, these can range from old CD’s, light foam material or shop bought toy wheels. The axle you use needs to be selected with the size of your wheels in mind. Also ensure that you use a rubber material, e.g. rubber bands, as a thread.
To attach the wheels drill four holes, one in each corner of the chassis approximately one inch from the mousetrap base. In each of these corners attach an eyehook, which will act as the support for the axle.
The axle needs to be made out of a sturdy and straight pole; this can either be doweling, a plastic rod or a metal pole. After the axle has been secured on the eyehooks, it is time to fasten the wheels into place. Make sure that your wheels sit equally on each axle and secure with a stopper to prevent them from moving. The stopper can be made out of anything from blue tack to sticky tape.
Driver String

How to Build a Mousetrap Car
You will require approximately ten to eleven inches of string to control your mousetrap car. Attach one end of the string to the rear axle (the rear axle is the one closest to the coil on the mousetrap). Check the string is securely fastened and re-measure the string. Remove any string left over after nine inches. Now attach the other end of the string to the arm bar of the currently inactive mousetrap.
Watch Your Mousetrap Car Go
It is now time to wind the rest of the string around the rear axle, however try not to do it too tight as this will prevent the mousetrap car reaching maximum speed. After a while you will need to attach the arm bar of the mousetrap to ensure all of the string is used up with little slack.
Using an instrument other than your hand, e.g. a pencil or spoon, set your mousetrap car in motion. Simply use your chosen appliance to activate the trap and watch it go.
Customize Your Mousetrap Car
It is possible to attach a motorised engine to your car to provide indefinite action. To do this, buy from a shop a car or train that contains a motorised engine. Remove the engine and attach to your mousetrap car. Alternatively, you can paint your chassis and trap, add glue in the dark accessories or attach the trap underneath the chassis to provide a leaver action on impact.
