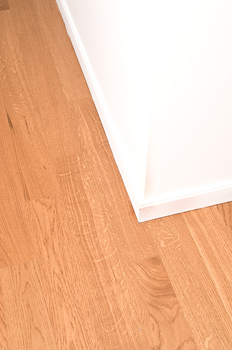
How to Install Hardwood Floor
Understanding how to install hardwood floor is not as difficult as it may sound — you can do it yourself with the right materials and enough time.
Installing Hardwood Floors
The following are steps for installing hardwood floors.
- Before you install your own wood flooring, stack the wood in the house for a few days to let the wood acclimate to the humidity level of your home.
- Another important planning step — put in the wood perpendicular to the floor joists. As a first step, mark the positions of the floor joists along a wall for reference and cover the sub floor with a layer of asphalt felt to keep out moisture moisture protection and prevent squeaky floors. You should also mark the center line of the room using a measuring tape and chalk line.
- Tack the asphalt felt down to the sub floor with a staple gun. Measure your room’s width at two points to establish an accurate center line, and make a chalk line parallel to your starting wall. Starting from the joist marks along the walls, snap chalk lines to mark the locations of the support boards. You’re basically building a grid.
- To determine the edge of the first row of wood flooring, make another chalk line about 1/2 inch from the starting wall parallel to your center line. This will leave a 1/2-inch gap between the flooring and the wall which will allow the wood to expand. Don’t worry — you’ll cover it with baseboard molding anyway.
- Pick your longest or widest boards for the first row. Start to drill pilot holes for 1 1/2 inch finishing nails near the wall where the nail heads will be covered by a baseboard. Now just do a quick nail job on the first row through the plywood sub flooring down to the floor joists. Use a nail set or other tool to set the nails below the floor’s surface, otherwise ouch.It is time to start blind nailing this row and the next two rows of wood by hand. Start by drilling pilot holes at a 45 degree angle through the tongues, centered on each joist at the ends and every 10 inches along the length of the boards. Fasten them with your 1 1/2-inch finishing nails.
- Once you’ve started installing the second row and every row after that, move a short scrap piece of flooring along the edge of your floor and give it a good solid hit with a mallet or hammer to tighten the new row against the previous row. Do this before you nail so the boards are even.
- Once you’ve reached the final row of wood flooring, use a block and a pry bar to wedge the last boards tightly into the proper position. You should drill holes and face nail all your boards where a base shoe or baseboard molding will cover, using the reference marks you made along the wall to find the joists. Don’t forget, again, to push the nail heads below the surface of the floor using a hammer and nail set.

How to Install Hardwood Floor
Installing hardwood floors isn’t an impossible task if you have the proper tools and a little elbow grease.
