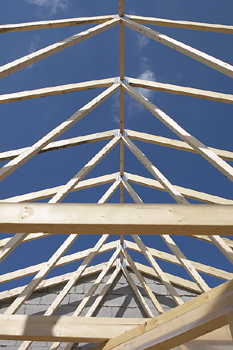
How to Build a Roof
Building a roof on a house can be a complicated, time-consuming and difficult process. Don’t get any illusions that roof building isn’t work. But if you’re wanting to build a pitch roof for your shed or other standing structure on your property, there’s no reason why you can’t learn how to build a roof and do it yourself.
Roofing Guide
In this roofing guide we’ll outline all the steps necessary for building a roof.
Choose the Type of Roof
Select which type of roof you want to add. The most common choices are slanted roofs, hip roofs and double pitch roofs.
- Slanted Roof – A “pitched roof” is a roof with more than 15 degrees gradient. These roofs are designed to redirect rainwater and other precipitation, so it doesn’t stand on the structure.
- Double Pitch Roof – A double-pitch roof is a roof with two different gradients. You’ll often see these one gazebos, but houses also have them.
- Hip Roof – All sides of are angled down, so there are no vertical sides or gables on the roof. Square hip roofs have a pyramid shape, but you’ll see rectangular hip roofs, too.
Use Software to Design the Roof
You’re better off using software to design your roof, if nothing else to get a basic idea of how much material to buy and where to begin.
Here are several options to help you get started. Figuring the pitch without some kind of pitch calculator can be a nightmare for amateurs.
Measure the Dimensions to be Roofed

How to Build a Roof
Before you can begin calculating your roof dimensions, you’ll need to measure the dimensions of the structure you want to roof. Once you have these numbers, plug them into the software to get your calculations.
Once you have your roof calculator work done, print it out to get an idea of the material you need, as well as a printout of the what the finished roof is supposed to look like.
Purchase Materials
Now that you have your calculations, decide how much material you need and purchase building materials. Once you have the materials on site, you’ll be ready to start the roof project.
Cut Main Frame Pieces
Start by cutting the main frame pieces of your roof. Assemble these pieces one-by-one. Try the first one for size, before you cut all your lumber. Make adjustments from this cut rafter piece.
Once you have your pieces cut, assemble the rafters.
Keep in mind you’ll need an assistant for the roofing part of this project. Getting help is a key factor.
Add Braces to the Rafters
When you have the rafters finished, add braces in key locations along the rafter framework. You want these bracers perpendicular to the rafters, so they fit in-between each of your rafters to add stability.
Cover the Rafters
Next, cover your rafters with plywood and tar paper. As you do this, mark parallel lines on your tar paper with chalk. Marking lines on the tar paper is essential for shingle placement later.
Shingle the Roof
Nail shingle onto the roof starting at the bottom of the roof, working up to the peak of the roof. Your shingles need to overhang your plywood by 3/4″ on the bottom and sides of your roof. Work one row at a time, from bottom to top of the roof, all the way across the face of your roof.
Building a Roof
Building a roof is a job, so be considerate to the helpers on your roofing project. Once you know how to calculate the pitch of your roof, you know how to build a roof. After that, it’s a matter of having the patience and energy to get on the roof and do the work needed.
Remember to be careful on the roof and on ladders, because you’re going to be significantly off the ground. Also be careful using any power tools you use while roofing.
